Gardening is a rewarding hobby, but many gardeners face challenges such as limited space, unpredictable weather, pests, and slow plant growth. What if there were a simple, innovative solution to overcome these hurdles? Enter the mini greenhouse in a bottle—a compact, DIY greenhouse that allows you to grow plants faster, healthier, and with minimal effort.
This guide explores how to create a mini greenhouse in a bottle, why it accelerates plant growth, and essential secrets for maximum results, making it perfect for beginners and experienced gardeners alike.
🌿 Why Use a Mini Greenhouse in a Bottle?
Mini greenhouses in bottles are small-scale, self-contained ecosystems that mimic the natural greenhouse environment. Their advantages include:
- Faster Growth: Warm, humid conditions promote quicker germination and stronger plant growth.
- Space Efficiency: Ideal for apartments, balconies, or small gardens.
- Reduced Watering Needs: Enclosed environments reduce water loss and evaporation.
- Pest Protection: Protects delicate seedlings from insects and disease.
- Low-Cost DIY: Uses everyday materials, making gardening accessible and affordable.
💡 Secret: By controlling temperature, humidity, and light, a bottle greenhouse creates the perfect microclimate for plant development.
🌱 Step 1: Choosing the Right Bottle
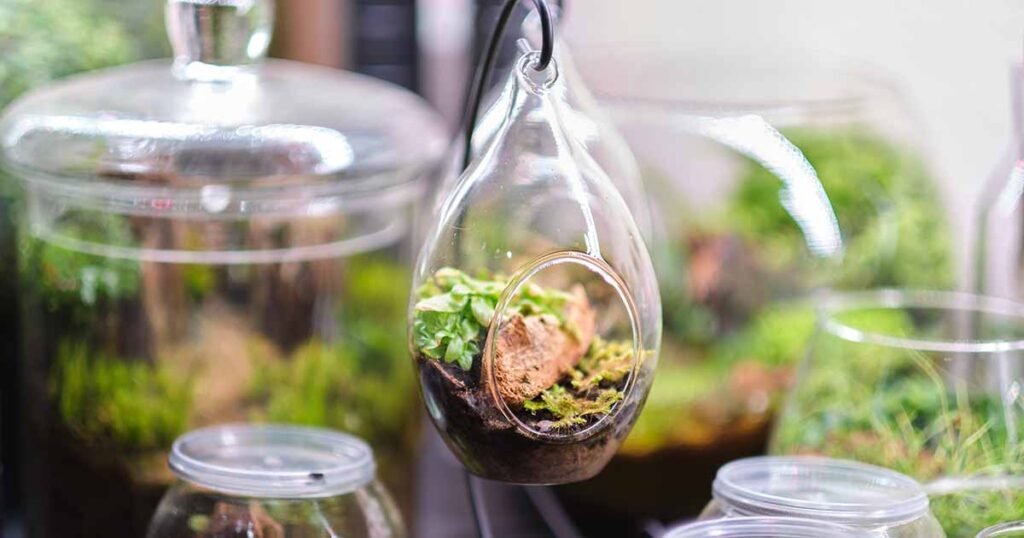
The first step is selecting an appropriate bottle for your mini greenhouse:
- Size: Medium to large plastic or glass bottles (1–2 liters) work best.
- Transparency: Clear bottles allow maximum sunlight penetration.
- Opening: Wide-mouthed bottles make planting and maintenance easier.
- Reusability: Clean, food-grade bottles are safe and eco-friendly.
💡 Pro Tip: Avoid colored or opaque bottles, as they reduce light penetration, slowing plant growth.
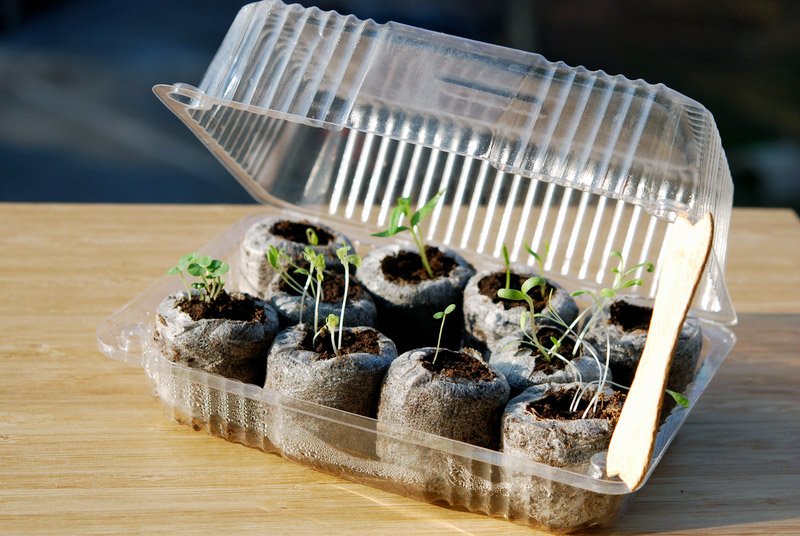
🌿 Step 2: Preparing the Bottle for Planting
Before adding soil and plants, prepare the bottle properly:
- Cutting (Optional): Cut the top of the bottle to create a removable lid for ventilation.
- Cleaning: Wash thoroughly to remove any residues or chemicals.
- Drainage: Add small stones or a layer of gravel at the bottom to prevent waterlogging.
💡 Secret: A well-prepared base ensures healthy roots and reduces the risk of rot.
🌱 Step 3: Choosing Soil and Plants
The right soil and plant selection are crucial for fast growth:
- Soil: Use a lightweight, well-draining potting mix. Add perlite or sand for aeration.
- Plants: Herbs like basil, rosemary, oregano, or small leafy greens work exceptionally well. Fast-growing vegetables like lettuce or spinach are also ideal.
- Seedlings: Starting with seedlings can produce faster results than seeds.
💡 Tip: Avoid deep-rooted plants, as bottles have limited space for roots.
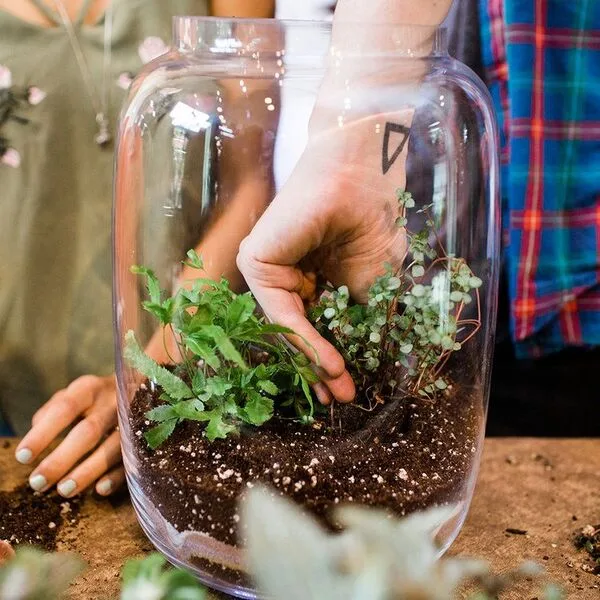
🌿 Step 4: Planting in the Bottle Greenhouse
Planting properly ensures strong growth:
- Fill the bottle with soil up to 2–3 cm from the top.
- Plant seeds or seedlings carefully, maintaining proper spacing.
- Lightly water the soil to settle it around the roots.
- Cover the bottle to create an enclosed environment.
💡 Secret: Gentle handling during planting prevents damage to delicate seedlings, which can slow growth if stressed.
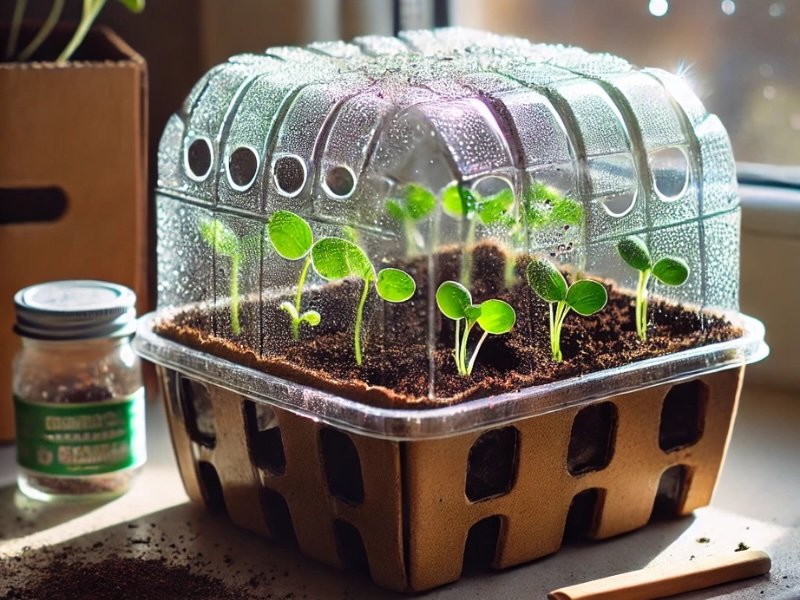
🌱 Step 5: Creating the Greenhouse Effect
The “mini greenhouse” effect is what accelerates plant growth:
- Humidity: The enclosed bottle traps moisture, maintaining high humidity.
- Temperature: Sunlight heats the air inside, creating a warm environment that stimulates root and leaf growth.
- Condensation Cycle: Water evaporates and condenses inside the bottle, recycling moisture.
💡 Secret: This self-sustaining ecosystem reduces the need for frequent watering while keeping plants healthy.
🌿 Step 6: Positioning Your Bottle Greenhouse
Correct placement ensures maximum growth:
- Light: Place near a bright window or under artificial grow lights. Plants need at least 6 hours of light per day.
- Temperature: Avoid extreme heat from direct afternoon sun, which can overheat the bottle.
- Ventilation: Occasionally remove the lid or make small ventilation holes to prevent mold and maintain airflow.
💡 Tip: Rotate the bottle every few days so plants grow evenly toward the light.
🌱 Step 7: Watering and Maintenance
Even though bottle greenhouses retain moisture, maintenance is still needed:
- Check Soil Moisture: Water lightly if the soil becomes too dry.
- Monitor Condensation: Excess condensation can indicate overwatering; remove the lid temporarily to reduce humidity.
- Clean the Bottle: Periodically clean the inside to prevent algae or mold growth.
💡 Secret: Consistent monitoring keeps your mini greenhouse environment stable, which is crucial for fast growth.
🌿 Step 8: Fertilizing for Accelerated Growth
Fertilization can boost production:
- Use diluted liquid fertilizer every 2–3 weeks.
- Organic fertilizers such as compost tea or worm castings provide nutrients without harming young plants.
- Avoid over-fertilizing, which can harm roots and leaves.
💡 Secret: Balanced nutrition supports rapid leaf and root development, making your plants grow faster than in open soil.
🌱 Step 9: Common Challenges and Solutions
- Mold and Fungus: Ensure proper ventilation and avoid excessive watering.
- Leggy Plants: Rotate the bottle and provide sufficient light to prevent stems from stretching.
- Algae Growth: Use a layer of sand or gravel on top of the soil to block light from the water layer.
- Overheating: Move the bottle to a slightly shaded area during the hottest part of the day.
💡 Secret: Early detection and small adjustments prevent major problems and keep your plants thriving.
🌿 Step 10: Harvesting from a Mini Bottle Greenhouse
Harvesting properly promotes continuous growth:
- Herbs: Pinch leaves regularly to encourage bushier plants.
- Leafy Greens: Harvest outer leaves first, leaving the center to grow.
- Small Vegetables: Harvest once fruits are mature to prevent stunted growth.
💡 Tip: Regular harvesting keeps plants healthy and encourages faster regrowth.
🌱 Step 11: Advantages of Mini Bottle Greenhouses

Using a bottle greenhouse provides numerous benefits:
- Space-saving: Perfect for small apartments, balconies, or indoor gardens.
- Faster Growth: Plants thrive in optimal temperature and humidity conditions.
- Low Maintenance: Reduced watering and pest protection.
- Cost-effective: Uses recycled materials and minimal equipment.
- Educational: Great for teaching children about plant growth and ecosystems.
💡 Secret: You can create multiple mini greenhouses to cultivate different herbs or vegetables simultaneously.
🌿 Step 12: Advanced Tips for Maximum Growth
- Use Clear Bottles: Maximum sunlight penetration enhances photosynthesis.
- Combine with Grow Lights: Provides light during winter or cloudy days.
- Experiment with Hydroponics: Some plants can grow entirely in water inside a bottle for ultra-fast growth.
- Pair Plants: Choose compatible herbs or vegetables for multi-layered growth in the same bottle.
💡 Secret: Small experiments with light, nutrients, and plant varieties can significantly boost results.
🌱 Final Thoughts
Creating a mini greenhouse in a bottle is an innovative, fun, and effective way to grow plants faster, healthier, and with less effort. By choosing the right container, soil, plants, and care techniques, you can enjoy rapid plant growth, even in limited spaces.
Whether you are a beginner gardener, a city-dweller with limited space, or someone seeking an engaging DIY project, this simple technique offers an accessible way to cultivate fresh herbs, leafy greens, and decorative plants year-round.
With patience, observation, and a few simple adjustments, your bottle greenhouse can become a thriving, self-sustaining mini garden, giving you abundant greens and herbs faster than traditional methods.