Watering your garden efficiently is one of the most important aspects of healthy plant growth. Overwatering wastes water, while underwatering can stress plants and stunt growth. A simple solution is a DIY dripper—a cost-effective, water-saving tool that delivers water directly to the roots of your plants. Making your own garden dripper is easier than you might think, and it can dramatically improve the health and yield of your garden. This guide will show you step by step how to make a dripper for your garden, along with tips for maintaining and optimizing your system.
1. Why a Garden Dripper is Important
Drip irrigation is a method that delivers water slowly and precisely to plants. The benefits include:
- Water conservation: Minimizes water loss due to evaporation or runoff.
- Healthier plants: Provides consistent moisture directly to the root zone.
- Reduced weed growth: Water is delivered only to the plant, not surrounding soil.
- Time-saving: Reduces the need for frequent manual watering.
- Cost-effective: DIY drippers can be made using inexpensive materials.
Creating a dripper tailored to your garden ensures each plant receives the water it needs, which is especially useful for vegetable beds, flower gardens, and container plants.
2. Materials Needed for a DIY Garden Dripper

You don’t need expensive tools to make a garden dripper. Most materials are affordable or can be recycled from household items. You will need:
- A plastic bottle or small container (500 ml to 2 liters)
- A small piece of plastic tubing or straw
- A nail, pin, or needle to make small holes
- Scissors or a sharp knife
- Water source (bucket, tank, or hose)
- Optional: Silicone sealant or tape to prevent leaks
These simple materials allow you to create a functional and efficient watering system.
3. Step-by-Step Guide to Making a Simple Dripper
Step 1: Prepare the Bottle
- Choose a sturdy bottle or container with a cap.
- Clean it thoroughly to remove any residues.
Step 2: Make Small Holes
- Use a pin, nail, or needle to poke small holes in the bottle cap or side.
- Start with 1–2 holes; you can enlarge them later to adjust water flow.
Step 3: Insert the Tubing (Optional)
- For precise watering, insert a small piece of tubing or a straw into the hole.
- Position the end near the base of your plant for direct root watering.
Step 4: Fill with Water
- Fill the bottle with water and check the dripping rate.
- If water drips too slowly, enlarge the holes slightly. If it drips too fast, cover partially with tape.
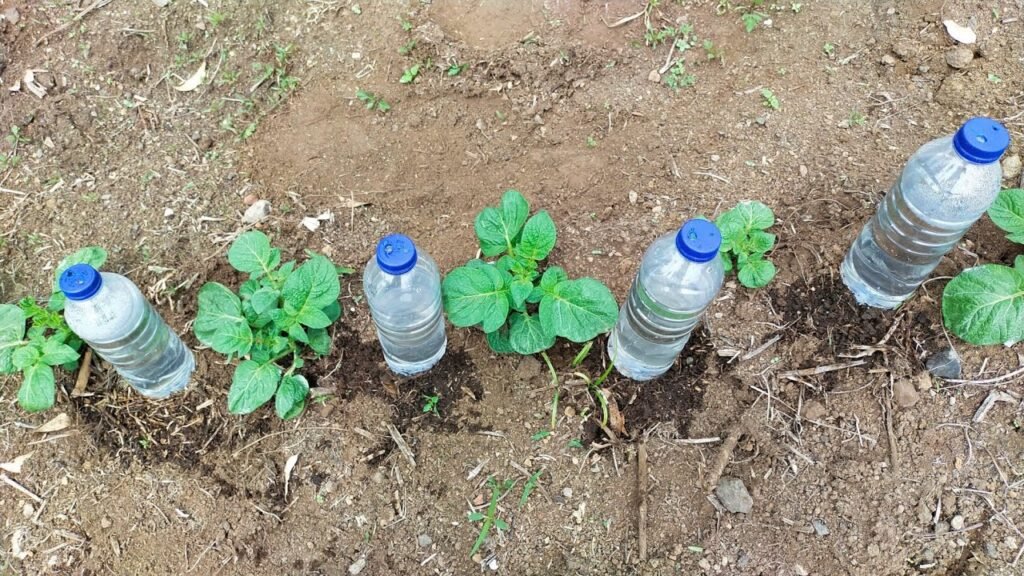
Step 5: Place Near Plants
- Insert the dripper into the soil near the plant roots.
- Ensure it is stable and upright for consistent water delivery.
4. Alternative DIY Dripper Designs
You can customize drippers based on your garden size and plant needs:
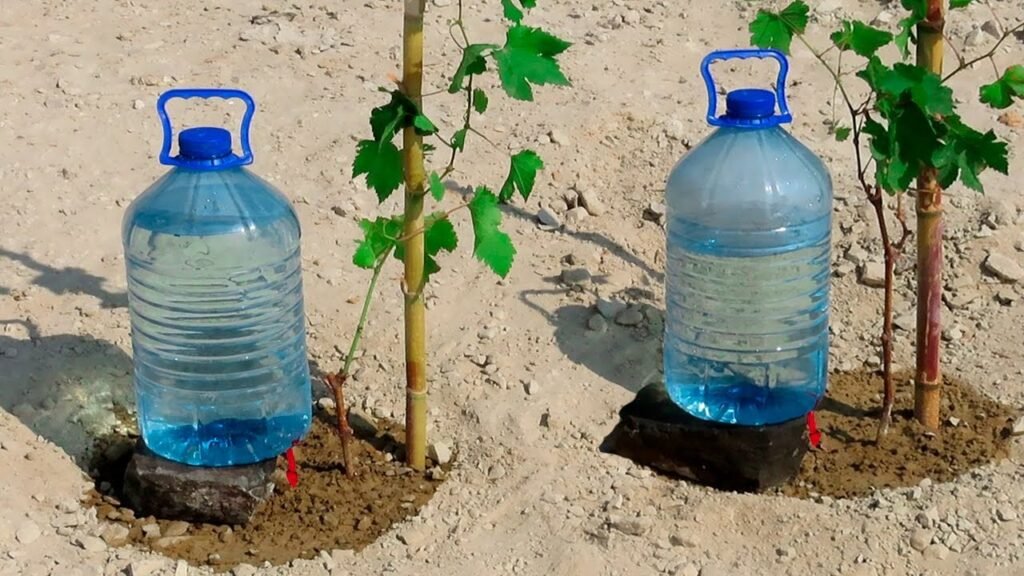
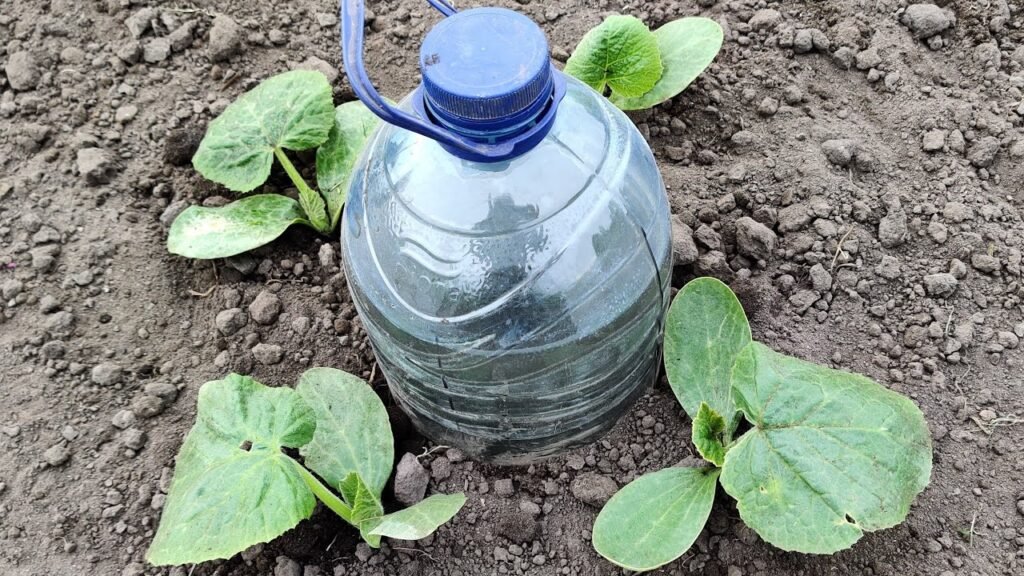
- Upside-Down Bottle Dripper
- Poke small holes in the cap of a bottle, fill it with water, and invert it into the soil near the plant.
- Gravity ensures a slow, steady drip.
- Straw or Tubing Dripper
- Cut a straw into short sections, poke tiny holes along the side, and insert into the soil.
- Connect multiple straws to a water source for rows of plants.
- Clay Pot Dripper
- Use a small unglazed clay pot, bury it partially in the soil, and fill it with water.
- Water slowly seeps through the porous walls, hydrating the roots over time.
5. Tips for Effective Watering
- Check soil moisture regularly: Adjust the flow rate to ensure plants receive enough water without waterlogging.
- Position near roots: Place drippers as close to the plant roots as possible for maximum efficiency.
- Use mulch: Mulching around the dripper helps retain moisture and reduces evaporation.
- Adjust for plant size: Larger plants may need multiple drippers or larger holes for adequate watering.
6. Maintaining Your Drippers
Even a simple DIY dripper requires occasional maintenance to function well:
- Check for clogs: Tiny holes can become blocked by dirt or algae. Clean with a pin or brush.
- Refill water: Ensure bottles or containers are topped up regularly.
- Inspect tubing: Replace any damaged or kinked tubing to maintain consistent flow.
- Adjust flow rate: Modify holes as plants grow to ensure proper water delivery.
7. Advantages of DIY Drippers Over Traditional Watering
- Customizable: You control the flow rate and placement for each plant.
- Cost-effective: Recycle bottles, straws, or containers instead of buying expensive kits.
- Water-efficient: Delivers water directly to the roots, reducing waste.
- Scalable: Suitable for small potted plants or large garden beds.
- Easy to install: No need for complex plumbing or equipment.
8. Using DIY Drippers for Different Plants

DIY drippers can be adapted for:
- Vegetables: Tomatoes, peppers, cucumbers, and lettuce thrive with steady watering.
- Fruit trees: Use larger bottles or multiple drippers for deep root watering.
- Indoor plants: Small bottles with pins or straws work perfectly for pots.
- Flowers and herbs: Maintain soil moisture without overwatering delicate plants.
9. Enhancing Your DIY Dripper System
For a more advanced setup:
- Connect multiple bottles to a single water source: Use tubing or hoses to water a row of plants simultaneously.
- Use a timer: Automate watering for consistent schedules.
- Add a filter: Prevent dirt or debris from clogging holes.
- Use recycled materials: Bottles, containers, or old tubes can be repurposed to create an eco-friendly irrigation system.
10. Eco-Friendly Gardening Benefits
Creating your own garden dripper supports sustainable gardening:
- Reduces water usage: Essential for dry climates or water conservation efforts.
- Recycles plastic: Old bottles and straws get a new purpose.
- Minimizes chemical use: Plants grow healthier with consistent moisture and less stress, reducing the need for pesticides.
- Encourages mindful gardening: Saves time and energy, allowing more focus on plant care and garden enjoyment.
11. Troubleshooting Common Issues
- Slow dripping: Check for clogged holes; clean with a pin or needle.
- Water flowing too fast: Reduce hole size or cover partially with tape.
- Leaning or unstable bottles: Secure with stakes or bury partially in soil.
- Uneven watering: Adjust placement near plant roots or add additional drippers.
12. Conclusion
Making a dripper for your garden is a simple, inexpensive way to improve plant health, conserve water, and save time. With a few household items, you can create a DIY drip irrigation system that delivers water precisely where it’s needed, keeping your plants thriving all season long. Whether you have a small balcony garden, a row of vegetables, or a backyard orchard, a homemade dripper can make a significant difference in growth and yield.
Start experimenting with different designs, adjust as needed, and enjoy the satisfaction of a garden that’s well-watered, productive, and eco-friendly. With DIY drippers, efficient gardening is literally at your fingertips.