Sweet potatoes are not only delicious and versatile, but they are also highly nutritious, packed with vitamins, minerals, and antioxidants. Growing your own sweet potatoes at home can be a deeply rewarding experience, and it all starts with cultivating healthy seedlings. Sweet potato seedlings, often called “slips,” are essential for establishing robust plants that produce large, flavorful tubers.
Whether you have a backyard garden, raised beds, or even containers, growing sweet potato seedlings is surprisingly easy with the right guidance. This article will walk you through the process step by step—from selecting healthy tubers and sprouting slips to planting, caring for seedlings, and preparing them for transplanting.
🌱 Why Grow Sweet Potato Seedlings?
Growing your own sweet potato seedlings offers several advantages:
- Stronger plants: Homegrown slips are more vigorous and disease-resistant
- Cost-effective: Produces multiple plants from a single tuber
- Better yield: Healthy seedlings lead to higher tuber production
- Flexibility: You can grow seedlings indoors before transplanting outdoors
- Control: Avoid chemical treatments and grow organically
By starting with seedlings, you can ensure a longer growing season, earlier planting, and ultimately a better harvest.
🛒 Selecting the Right Sweet Potato Tubers
The first step is choosing tubers suitable for sprouting.
Tips for Selecting Tubers:
- Choose healthy, disease-free tubers without blemishes or soft spots
- Prefer organic or untreated tubers to avoid chemicals that inhibit sprouting
- Medium-sized tubers (150–300 grams) are ideal for sprouting
- Look for tubers with intact skin and firm flesh
Using good-quality tubers ensures faster sprouting and healthier seedlings.
🌿 Preparing Sweet Potatoes for Sprouting
To grow seedlings, you need to encourage the tuber to produce slips.
Step 1: Clean the Tubers
- Rinse off soil gently
- Allow them to air-dry for a few hours
Step 2: Choose a Sprouting Method
There are three common methods to produce slips:
Method 1: Water Method
- Place tubers in a jar of water, half-submerged
- Use toothpicks to suspend tuber halfway
- Keep in bright, indirect sunlight
- Change water every 2–3 days
- Slips emerge in 2–3 weeks

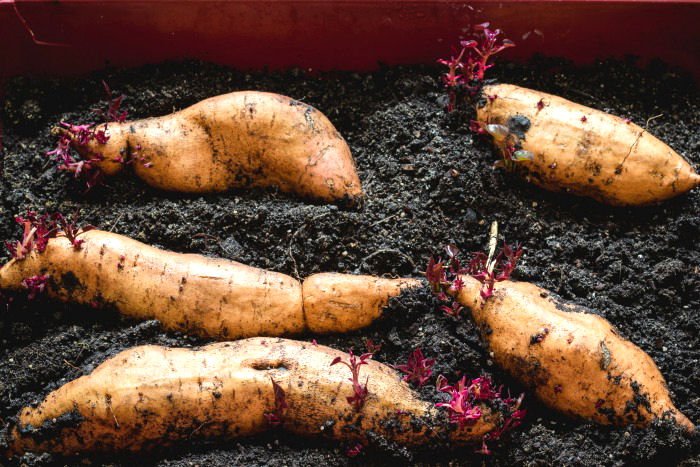
Method 2: Soil Method
- Plant tubers horizontally in a shallow tray filled with moist soil
- Keep soil consistently moist
- Place tray in warm, bright location
- Sprouts appear within 2–3 weeks
Method 3: Heat Mats or Warm Location
- Sweet potatoes sprout faster in temperatures of 24–30°C (75–86°F)
- Use a warm windowsill, greenhouse, or heat mat to speed up sprouting
🌱 Growing Healthy Sweet Potato Slips
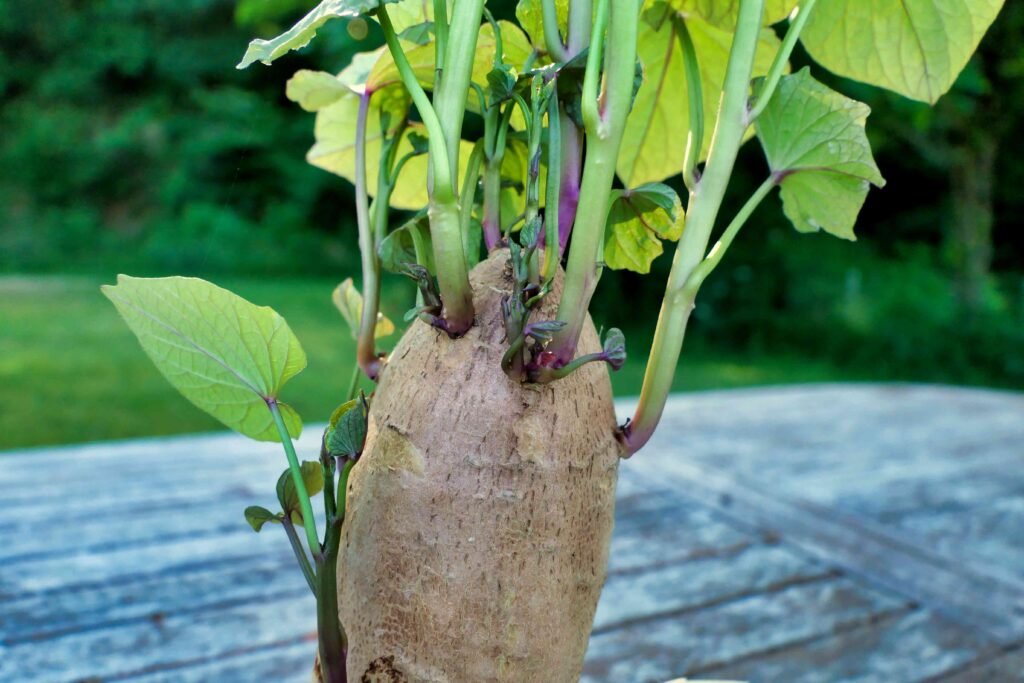
Once sprouts appear, they will develop into slips.
Step 1: Let Slips Grow to 6–8 Inches
- Wait until the sprouts are about 6–8 inches long
- Ensure they have several leaves
Step 2: Separate Slips from Tubers
- Twist gently or cut at the base
- Each slip should have small roots forming
Step 3: Root the Slips
- Place slips in water or moist soil
- Roots will develop in 7–10 days
- Once roots are 2–3 inches long, seedlings are ready for transplanting
Tip: Rooting slips in water allows you to monitor root growth easily.
🪴 Preparing the Planting Area
Before transplanting seedlings, prepare the soil or container:
Soil Requirements:
- Well-draining, sandy loam or loamy soil
- pH between 5.5–6.5
- Enriched with compost or well-rotted manure
Planting Location:
- Sunny spot with 6–8 hours of sunlight
- Raised beds, garden rows, or large containers
- Avoid waterlogged areas to prevent rot
🌱 Transplanting Sweet Potato Seedlings
Step 1: Harden Off Seedlings
- Acclimate seedlings to outdoor conditions for 4–7 days
- Place them outside for a few hours each day, gradually increasing exposure
Step 2: Plant Slips
- Space slips 12–18 inches apart in rows 3 feet apart
- Plant deeply enough so roots are covered and base of the slip is stable
- Water immediately after planting
Step 3: Mulch
- Mulch around seedlings with straw, leaves, or grass clippings
- Retains moisture and reduces weed competition
💧 Watering Sweet Potato Seedlings
- Keep soil consistently moist during the first 2–3 weeks
- Reduce watering slightly after establishment
- Avoid overwatering to prevent rot and fungal diseases
Mulching helps retain moisture and regulate soil temperature.
🌿 Fertilizing for Faster Growth
Sweet potato seedlings benefit from moderate fertilization:
- At planting: Incorporate compost or well-rotted manure into the soil
- 2–3 weeks after transplanting: Use liquid vermicompost or organic NPK fertilizer
- Avoid excessive nitrogen: Focus on phosphorus and potassium for root and tuber development
Regular feeding encourages bushy vines, healthy leaves, and robust tuber formation.
✂️ Training and Care
- Remove yellow or damaged leaves
- Guide vines to prevent overcrowding
- Monitor for pests like aphids, whiteflies, and wireworms
- Use neem oil or companion planting to reduce pest pressure
Healthy seedlings develop into strong plants capable of producing a high yield.
🌡 Ideal Temperature and Sunlight
Sweet potato seedlings thrive in:
- Daytime: 24–30°C (75–86°F)
- Nighttime: 18–22°C (65–72°F)
Full sun exposure accelerates growth and increases tuber size. Provide partial shade only in extremely hot regions.
🛡 Pests and Diseases to Watch For
- Fungal infections: Avoid waterlogged soil, ensure good airflow
- Aphids and whiteflies: Treat with neem oil or insecticidal soap
- Wireworms or nematodes: Rotate crops and inspect soil before planting
Proper monitoring ensures seedlings remain healthy and grow vigorously.
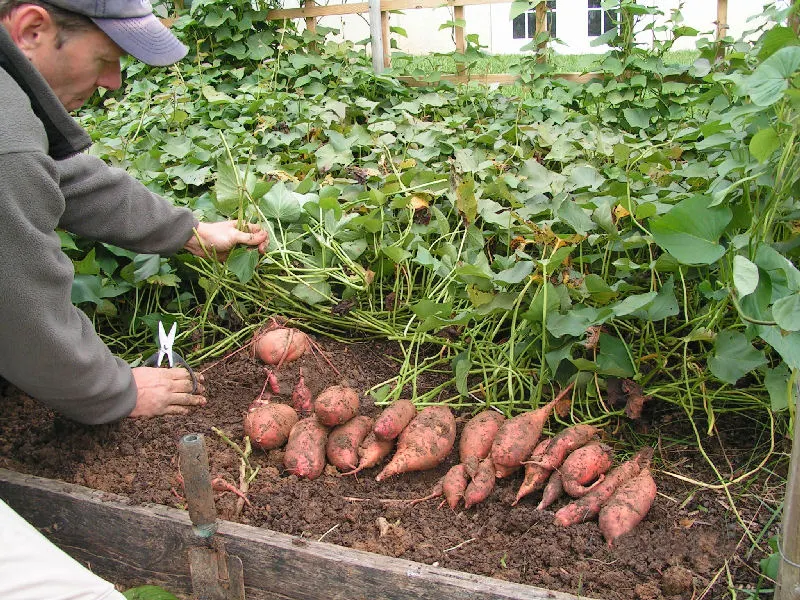
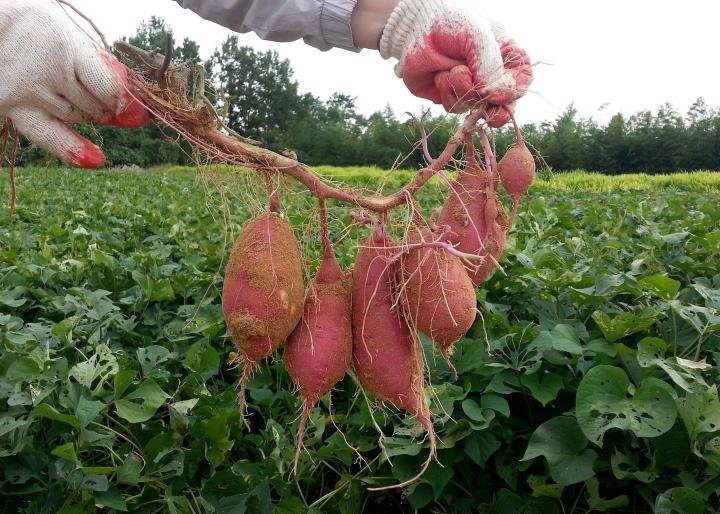
🍠 Harvesting Sweet Potatoes
- Sweet potatoes are usually ready for harvest 90–120 days after transplanting, depending on variety
- Leaves begin to yellow as tubers mature
- Gently dig up tubers, avoiding damage
- Cure in a dry, ventilated area for 1–2 weeks to enhance sweetness and storage life
Harvesting properly ensures the best flavor and longer shelf life.
🌟 Tips for Success
- Start tubers indoors early to extend the growing season
- Root slips in water to monitor progress
- Maintain consistent watering and avoid waterlogging
- Mulch generously to conserve moisture and suppress weeds
- Rotate crops annually to maintain soil health
🌿 Conclusion
Growing sweet potato seedlings is the key to a successful harvest. By starting with healthy tubers, producing strong slips, and carefully transplanting and caring for seedlings, you can enjoy nutritious, delicious sweet potatoes from your own home garden.
This method is flexible, space-efficient, and suitable for backyard gardeners, raised beds, or container gardening. With proper sunlight, water, soil, and care, your sweet potato seedlings will develop into vigorous plants, producing large, flavorful tubers that make every effort worthwhile.