Creating a vegetable garden doesn’t have to be expensive or complicated. In fact, with a bit of creativity and the right approach, you can turn ordinary plastic waste—like bottles, containers, and jars—into a fully functional, productive vegetable garden. This method is perfect for beginners, urban gardeners, and anyone who wants to grow fresh, organic vegetables at home without investing in expensive pots or planters.
Plastic is often seen as waste, but with a little effort, it becomes one of the best resources for DIY gardening. Lightweight, durable, easy to cut, and completely waterproof, plastic materials can transform balconies, terraces, windowsills, and small backyards into bountiful green spaces.
In this comprehensive guide, you’ll learn how to create your own vegetable garden using plastic bottles and recycled containers—from choosing the right vegetables and preparing containers to planting, maintaining, and harvesting your crops.
Why Use Plastic for Gardening?
Using plastic waste for gardening is not only cost-effective but also environmentally friendly. Instead of throwing away bottles, jars, and containers, you give them a new purpose.
Benefits of Plastic Gardening:
- Zero Cost: Most of your gardening containers come from household waste.
- Lightweight: Easy to move, hang, stack, or arrange.
- Weather-Resistant: Durable in rain, sun, and wind.
- Customizable: Cut or shape as needed for different plants.
- Eco-Friendly: Helps reduce pollution and waste.
This technique is highly effective for people living in cities where gardening space is limited. A few bottles and a small corner are all you need to start growing fresh vegetables.
Choosing the Right Plastic Containers
Almost any plastic container can be used for gardening. The key is selecting the right size based on the plant’s root depth.
1. Plastic Bottles (1L, 2L, 5L)
Perfect for herbs, leafy vegetables, and small plants.
Best for:
- Mint
- Spinach
- Lettuce
- Coriander
- Basil
- Green onions
2. Large Cans or Plastic Buckets
Ideal for bigger vegetables with deeper roots.
Best for:
- Tomatoes
- Peppers
- Brinjals (Eggplant)
- Beans
- Cucumbers
3. Plastic Trays or Containers
Suitable for seed starting and microgreens.
4. Oil Cans and Detergent Bottles
Great for vertical gardening and hanging setups.
Preparing Plastic Containers for Planting
Before planting, you must prepare your containers properly.
1. Clean Thoroughly
Wash the bottles or cans to remove any chemicals, oil, or residue.
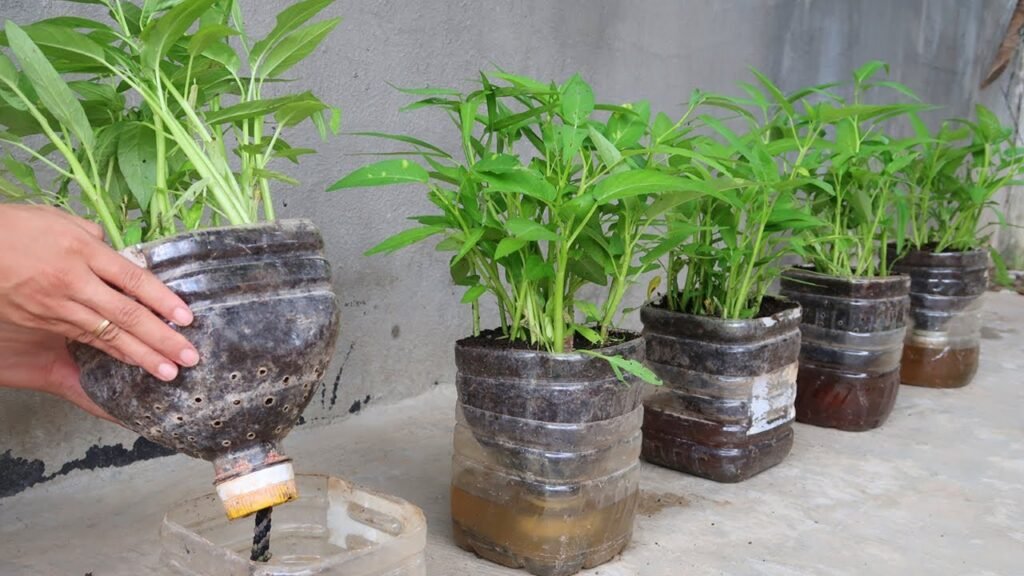
2. Make Drainage Holes
The most important step!
Plants hate waterlogging, so poke 5–10 holes at the bottom using a nail or heated metal rod.
3. Create Side Windows (Optional)
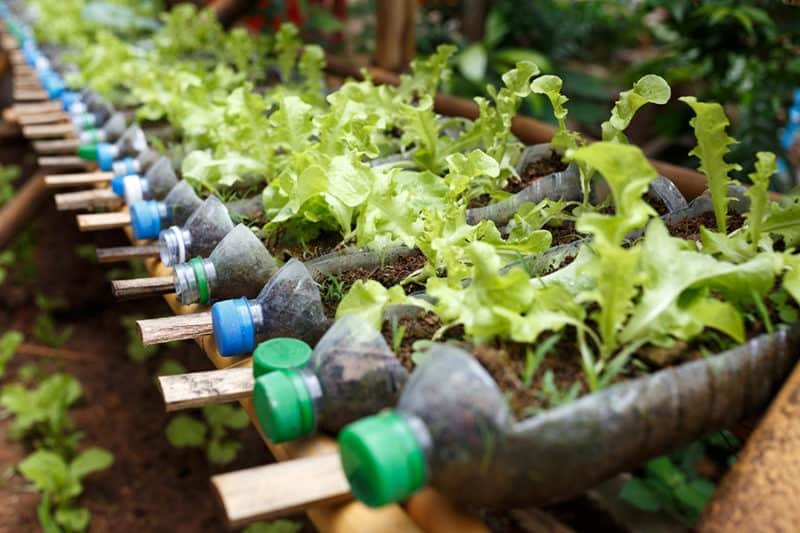
For horizontal bottle gardening:
- Lay the bottle horizontally.
- Cut a rectangular window on one side.
This creates more planting space for herbs and leafy greens.
4. Add a Drainage Layer
Place small stones, gravel, or pieces of broken plastic at the bottom to improve drainage.
The Perfect Soil Mix for Vegetable Gardening
Good soil is key to healthy vegetables.
Create this homemade mix:
- 40% garden soil
- 40% compost or vermicompost
- 20% sand or cocopeat
Why this works:
- Compost provides nutrients
- Sand/cocopeat ensures proper drainage
- Loose soil allows roots to grow freely
Mix well before adding to your plastic containers.
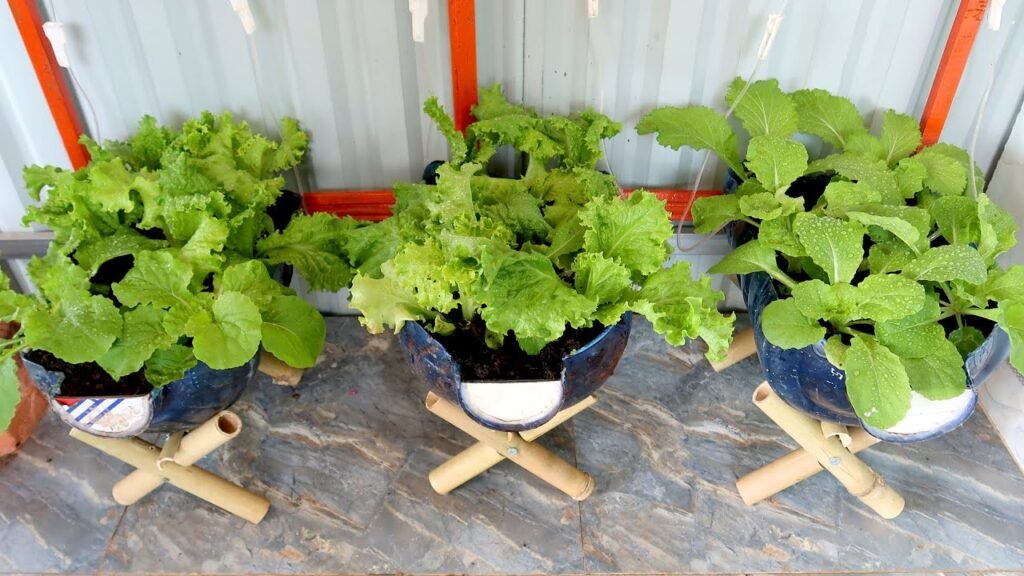
Choosing Vegetables That Thrive in Plastic Containers
Some vegetables grow exceptionally well in small spaces. Choose plants that don’t need deep soil or large areas.
Best Vegetables for Plastic Bottle Gardening
Leafy greens (fast-growing, space-saving):
- Spinach
- Lettuce
- Amaranth
- Kale
- Fenugreek (Methi)
Herbs (very easy and productive):
- Mint
- Cilantro
- Parsley
- Basil
- Chives
Compact vegetables:
- Cherry tomatoes
- Chili peppers
- Radish
- Carrots (short varieties)
- Beans (in larger containers)
- Cucumbers (with vertical support)
Growing these vegetables ensures quick results and abundant harvests.
Planting in Plastic: Simple Step-by-Step Guide
1. Fill the Container
Leave 2–3 cm space at the top for easy watering.
2. Sow Seeds or Plant Cuttings
- Herbs grow best from cuttings.
- Leafy greens grow best from seeds.
- Peppers and tomatoes can be planted as seedlings.
3. Water Gently
Use a spray bottle to avoid washing away seeds.
4. Keep in a Bright Spot
Vegetables need 4–6 hours of sunlight daily.
Leafy greens tolerate partial shade, while fruiting plants need full sun.
Watering: Keep the Balance Right
Plastic containers dry out faster than clay pots.
Follow these tips:
- Water every 1–2 days in summer
- Water every 3–4 days in winter
- Always check the top soil before watering
- Avoid waterlogging at all costs
Use a watering can or bottle with small holes for even watering.
Feeding Your Vegetable Plants for Maximum Growth
Vegetables grow fast and need regular nutrition.
Use these organic fertilizers:
- Compost
- Cow dung manure
- Vermicompost tea
- Banana peel water
- Eggshell powder
- Wood ash (for potassium)
Fertilizing Schedule
- Add a handful of compost every 20 days
- Apply liquid fertilizers every 10–12 days
- Use wood ash during flowering for stronger plants
Avoid heavy chemical fertilizers in small containers—they can damage the roots.
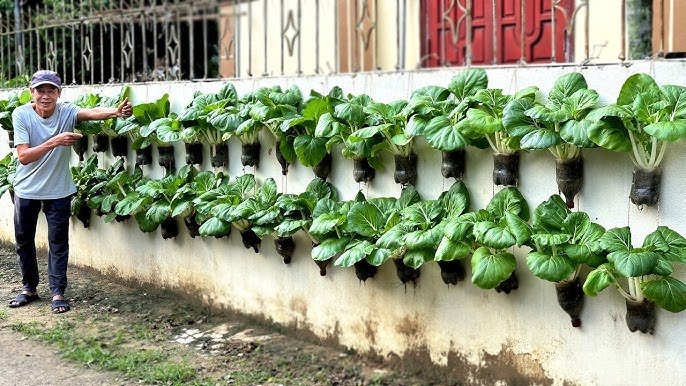
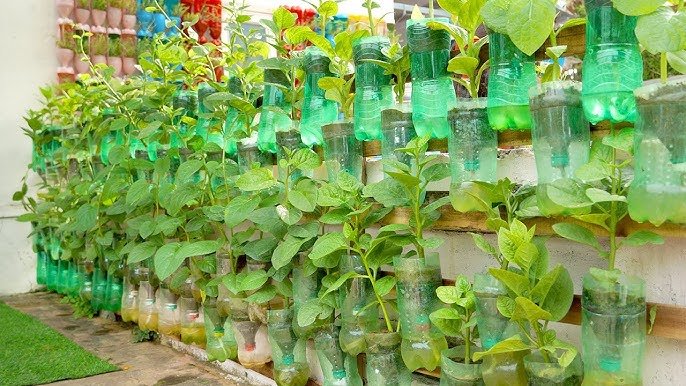
Creating a Vertical Garden with Plastic Bottles
One of the biggest advantages of using plastic for gardening is the ability to create vertical gardens.
How to Do It:
- Cut horizontal openings in several 2-liter bottles.
- String them together using rope or wire.
- Hang them on a balcony wall.
- Fill with soil and plant herbs or leafy greens.
Vertical gardening:
- Saves space
- Looks beautiful
- Allows more plants in small areas
Perfect for balconies and apartment gardens.
Common Problems and How to Fix Them
1. Plants Drying Too Fast
Cause: Small bottle size
Solution: Mulch with dry leaves or use larger bottles
2. Yellow Leaves
Cause: Overwatering or poor drainage
Solution: Increase drainage holes
3. Slow Growth
Cause: Lack of nutrients
Solution: Add compost or liquid fertilizer
4. Plants Leaning or Falling
Cause: Weak support
Solution: Add small sticks for tomatoes, peppers, and cucumbers
Harvesting Your Homegrown Vegetables
Harvesting is the most satisfying part of gardening.
Leafy greens:
- Ready in 25–40 days
- Cut outer leaves and let the center continue growing
Herbs:
- Harvest regularly to encourage bushy growth
Tomatoes and peppers:
- Pick gently without breaking branches
Root vegetables:
- Uproot once they reach full size
The more you harvest, the more your plants grow!
Benefits of Growing Vegetables in Plastic Gardens
- Fresh, organic vegetables at home
- Zero investment
- More sustainable lifestyle
- Great way to recycle plastic
- Perfect for kids and beginners
- Works in tiny spaces
- Fun DIY project
- Reduces dependence on store-bought produce
This method proves that gardening is not about money or land—it’s about creativity and care.
Final Thoughts: Turn Plastic Waste Into a Green Paradise
Creating a vegetable garden using plastic bottles is one of the easiest, cheapest, and most sustainable ways to grow your own food. With just a few recycled containers, good soil, water, and sunlight, you can enjoy fresh vegetables right from your balcony or windowsill.
It doesn’t matter whether you live in a tiny apartment or have limited gardening experience—you can transform plastic waste into a productive, eco-friendly garden starting today.