Cabbage is one of the healthiest and most versatile vegetables you can grow at home. Whether you enjoy it in salads, soups, stir-fries, or pickles, fresh homegrown cabbage offers unmatched flavor and nutrition. But what if you don’t have a large garden—or any garden at all? Good news: You can grow cabbage in a simple plastic bottle!
This innovative, space-saving method is transforming home gardening. It’s perfect for balcony gardens, small apartments, terraces, or anyone who wants to recycle plastic while growing fresh vegetables. With just a little preparation and care, you can harvest crisp, green, farm-quality cabbage right from a bottle.
Here’s a complete, step-by-step, 1200-word guide that teaches you how to grow cabbage in a bottle successfully—even if you’re a beginner.
1. Why Grow Cabbage in a Plastic Bottle?
Growing cabbage in a plastic bottle might sound unusual, but it’s actually incredibly effective. Here’s why this method works so well:
Space-Saving
You only need one plastic bottle per plant—no ground space required.
Cost-Effective
Instead of buying pots, you repurpose waste bottles.
Helps with Recycling
Reduces plastic waste and keeps bottles out of the environment.
Great for Small Gardens
Ideal for balconies, rooftops, windowsills, and indoor setups.
Easy to Maintain
Bottles help control soil moisture and root growth.
Mobile Gardening
You can move bottles easily to adjust sunlight.
This method is practical, eco-friendly, and surprisingly productive.
2. Materials You’ll Need
To get started, gather the following basic items:
- 2–5 liter plastic bottle
- Sharp knife or scissors
- Potting soil (loamy, well-drained)
- Compost or organic manure
- Cabbage seedling or seeds
- Small stones or gravel
- Spray bottle
- Water
Optional:
- Neem cake powder
- Cocopeat
- Bone meal
Once you have these items, you’re ready to begin your bottle garden.
3. Preparing the Plastic Bottle
Choosing the right bottle and preparing it correctly is essential for healthy cabbage growth.
Step 1: Select the Bottle Size
Use a 2-liter bottle for small cabbage varieties. For larger varieties, use 5-liter water bottles.
Step 2: Cut the Bottle
There are two methods:
Horizontal Method:
Cut a wide rectangle on the side of the bottle. This creates a small planter.
Vertical Method (Most Common for Cabbage):
Cut the top portion off, leaving an open mouth. This turns the bottle into a deep container.
Step 3: Add Drainage Holes
Use a heated nail or scissors to poke 5–10 holes at the bottom for drainage.
Step 4: Add a Layer of Gravel
Place small stones or pebbles at the bottom to help prevent waterlogging.
Your bottle pot is now ready!
4. Preparing the Perfect Soil Mix

Cabbage grows best in nutrient-rich, loose, and well-draining soil.
Ideal Soil Mix:
- 50% garden soil
- 30% compost or cow dung
- 20% cocopeat or sand
Enhancers for Better Growth:
- 1 tablespoon of neem cake powder
- 1 tablespoon of wood ash
- 1 handful of bone meal
Mix everything thoroughly. Cabbage is a heavy feeder, so nutrient-rich soil supports strong growth and large heads.
5. Planting Cabbage in the Bottle
Now that your bottle and soil are ready, it’s time to plant!
Option 1: Using Seedlings
This is the easiest and fastest method.
- Make a hole 2–3 inches deep.
- Place one healthy cabbage seedling.
- Bury the roots and firm the soil gently.
- Water lightly.
Option 2: Using Seeds
- Sprinkle 3–4 seeds on the soil surface.
- Cover with a thin layer of soil.
- Water gently using a spray.
- After germination, keep only the strongest seedling.
Whichever method you choose, ensure only one cabbage plant per bottle to avoid overcrowding.
6. Light Requirements: Sun Is the Secret
Cabbage loves sunlight. To grow it successfully:
- Provide 4–6 hours of direct sunlight daily.
- Place the bottle near a sunny window, balcony, or terrace.
- Rotate the bottle weekly for even growth.
If sunlight is limited, use an LED grow light for 6–8 hours.
7. Watering: Keep It Balanced
Cabbage prefers consistently moist soil—but not soggy soil.
Watering Tips:
- Water when the top 1 inch of soil feels dry.
- Use a spray bottle for young seedlings.
- Avoid overwatering, which can cause root rot.
- Use mulch (dry leaves) to maintain soil moisture.
The transparent bottle helps you see moisture levels inside—another advantage!
8. Feeding Your Bottle-Grown Cabbage
Cabbage is a heavy nutrient consumer. Feed your plant regularly for best results.
Fertilizer Schedule:
Week 1–2:
Apply diluted seaweed or compost tea.
Week 3–6:
Add a handful of compost around the plant.
Week 7–10:
Feed with potassium-rich fertilizer (banana peel tea or wood ash).
Week 10 onward:
Repeat compost tea every 10 days.
This ensures steady growth and big, healthy cabbage heads.
9. Supporting the Plant as It Grows
Cabbage foliage grows wide. To support it:
- Keep the bottle upright.
- Ensure there’s enough space between multiple bottles.
- Prune damaged outer leaves.
- Keep the soil level below the bottle rim to prevent leaf damage.
A single plant can grow well when given enough breathing room.
10. Preventing Common Pests and Diseases
Bottle-grown cabbage is less prone to pests, but some issues may still arise.
Common Pests:
- Aphids
- Caterpillars
- Whiteflies
Organic Pest Control:
- Neem oil spray (once a week)
- Soap water spray
- Garlic-chili spray
- Hand-picking caterpillars
Diseases to Watch For:
- Black rot
- Root rot (due to poor drainage)
- Powdery mildew
Ensure proper air circulation and avoid overwatering to prevent disease.
11. When and How to Harvest Cabbage
Cabbage typically takes 70–90 days to mature when grown under good conditions.
Signs Your Cabbage Is Ready:
- Firm, tight head
- Leaves fully developed
- Size appropriate for the variety
How to Harvest:
- Use a sharp knife.
- Cut the cabbage at the base of the head.
- Leave outer leaves behind—they may grow small side heads!
Bottle-grown cabbage is usually smaller but extremely tender and flavorful.
12. Creative Ways to Display and Arrange Bottle Cabbage Gardens
Growing cabbage in bottles can be both practical and beautiful. Here are some creative ideas:
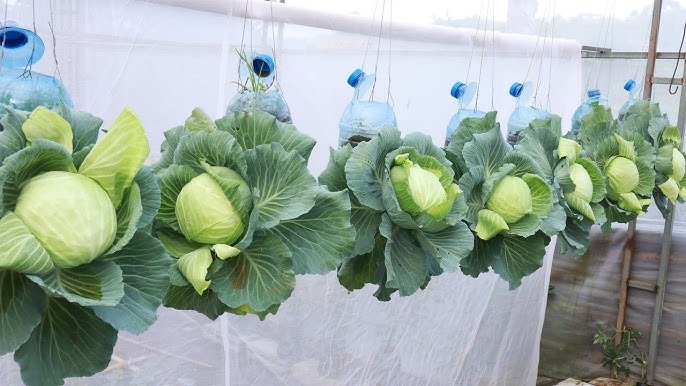
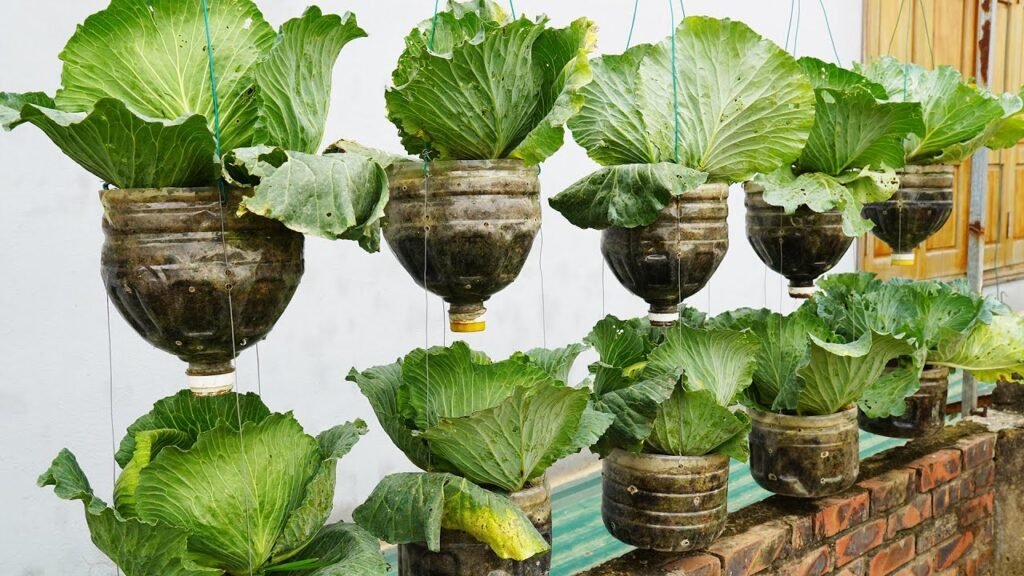
Vertical Bottle Garden
Hang bottles using ropes or wires.
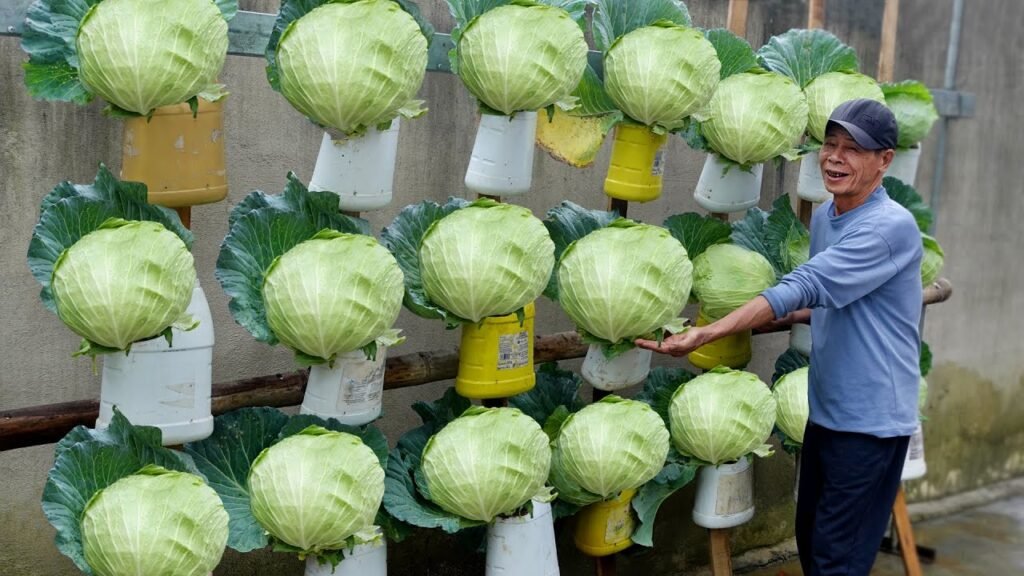
Wall-Mounted Bottle Planters
Attach bottles to walls or wooden frames.
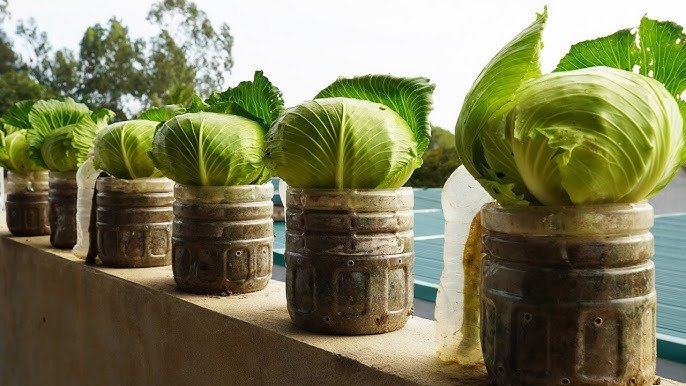
Bottle Bed Arrangement
Group multiple bottles in a row for a neat garden effect.
Colorful Painted Bottles
Paint bottles to improve aesthetics and protect roots from heat.
This method turns your vegetable garden into a decorative masterpiece.
13. Environmental Impact: A Greener Solution
By repurposing plastic bottles:
- You reduce waste
- Lower plastic pollution
- Promote sustainable living
- Grow your own food at no cost
Small actions like this make a big difference to the planet.
Final Thoughts
Growing cabbage in a bottle is an exciting, eco-friendly, and accessible gardening technique that works wonderfully in small spaces. With minimal materials, little effort, and simple steps, anyone—from beginners to experienced gardeners—can enjoy harvesting fresh, homegrown cabbage.
This method not only helps you save space and recycle waste but also gives you the joy of producing healthy vegetables right at home. Try it once, and you’ll want to grow more crops using this smart bottle gardening strategy.