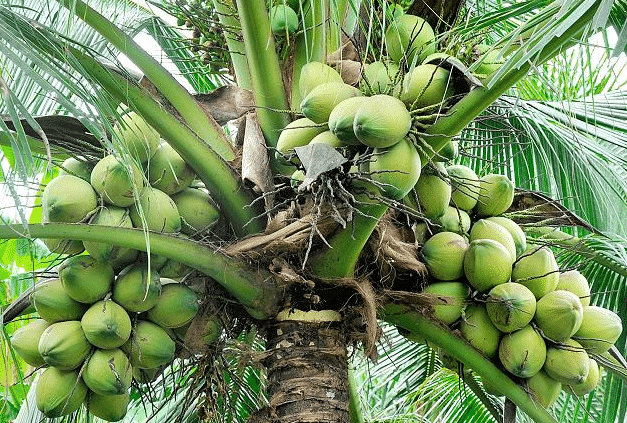
Coconut trees, often called the “tree of life,” are highly valued for their nutritious fruits, oil, water, and versatile leaves. Traditionally grown in tropical regions, coconut trees can take several years to establish and start producing coconuts. However, a great new technique for growing coconut trees is now making it easier, faster, and more efficient for both home gardeners and commercial growers.
This method focuses on improving germination, root development, and early growth of coconut seedlings. By following this technique, you can grow healthy coconut palms that bear fruits faster and thrive in a variety of soil conditions.
🥥 Why This New Technique is Revolutionary
Traditional coconut propagation involves planting mature coconuts directly in the soil. While effective, it has limitations:
- Long germination period (6–12 months)
- Uneven seedling growth
- Higher risk of seedling mortality
The new technique overcomes these problems by optimizing:
- Pre-treatment of coconuts
- Controlled sprouting
- Nurturing seedlings in ideal conditions before field transplantation
Advantages of the New Technique:
- Faster germination
- Stronger root and shoot development
- Higher survival rates
- Uniform, healthy seedlings
- Earlier fruit production
🥥 Step 1: Selecting the Right Coconut for Planting
The first step is choosing a high-quality, mature coconut. Key characteristics include:
- Fully brown and mature
- Heavy in weight (indicates water content and nutrient richness)
- Free from cracks, mold, or pest damage
- Preferably from a high-yielding variety
Tip: Avoid coconuts that have dried excessively or fallen long ago, as their germination rate is low.
🥥 Step 2: Pre-Treatment of the Coconut
Pre-treatment ensures faster sprouting and healthy seedlings:
- Soak the coconut in water for 3–5 days.
- Rotate the coconut daily to ensure even moisture absorption.
- Optionally, wrap the coconut in moist burlap or coir to maintain humidity.
This softens the outer shell slightly and encourages early root emergence.
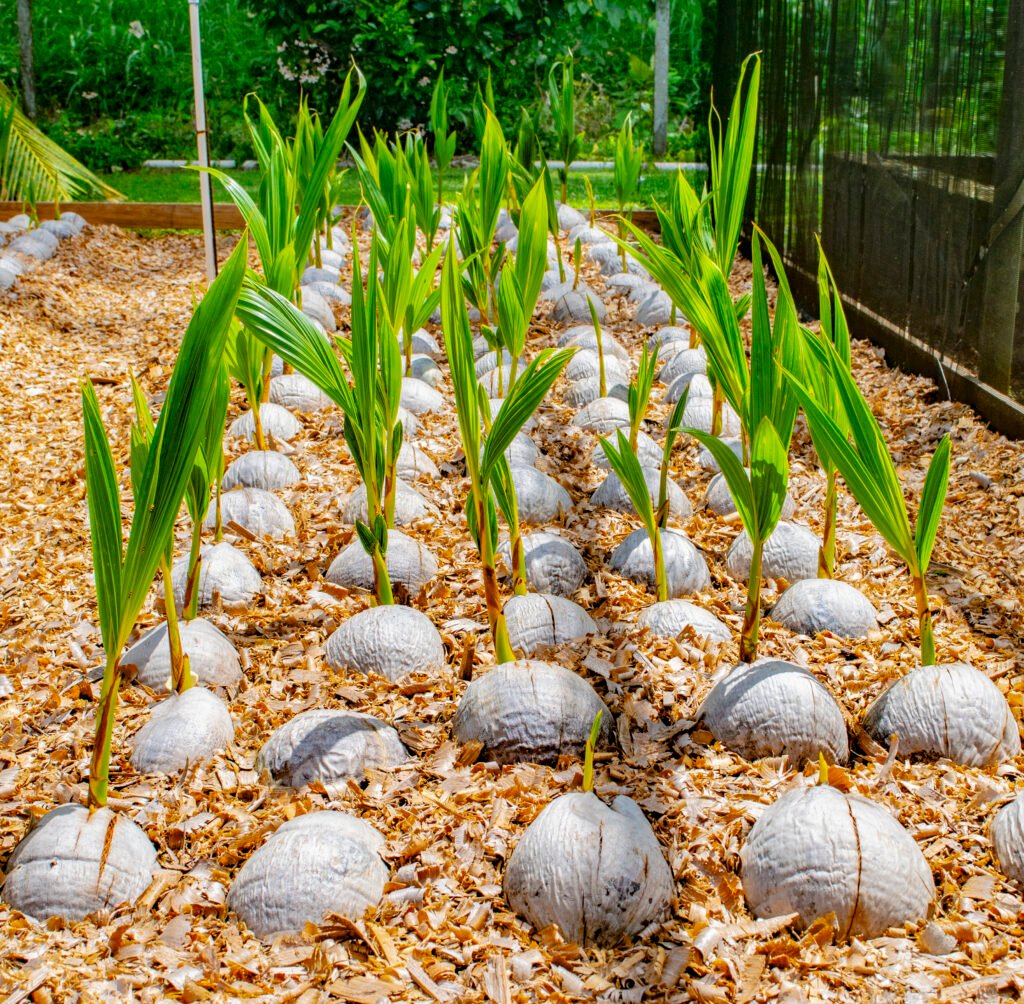
🥥 Step 3: Preparing the Germination Bed
Instead of planting directly in the field, creating a controlled germination bed is highly effective:
Materials Needed:
- Raised bed or large container
- Well-draining soil mixture:
- 40% garden soil
- 30% compost or cow dung
- 20% sand
- 10% cocopeat
Instructions:
- Fill the bed or container with the soil mixture.
- Ensure good drainage to prevent waterlogging.
- Place coconuts lying horizontally, with the pointed end slightly elevated.
This encourages uniform sprouting of roots and shoots.
🥥 Step 4: Controlled Sprouting
Using the new technique, controlled sprouting accelerates growth:
- Cover coconuts with thin mulch or coir fibers to retain moisture.
- Keep the germination bed in partial sunlight (morning sun, afternoon shade).
- Maintain consistent soil moisture by watering daily or as needed.
⏳ Expected Sprouting Time:
- Traditional planting: 6–12 months
- New technique: 3–6 months
Roots and shoots emerge faster due to optimal moisture and controlled conditions.
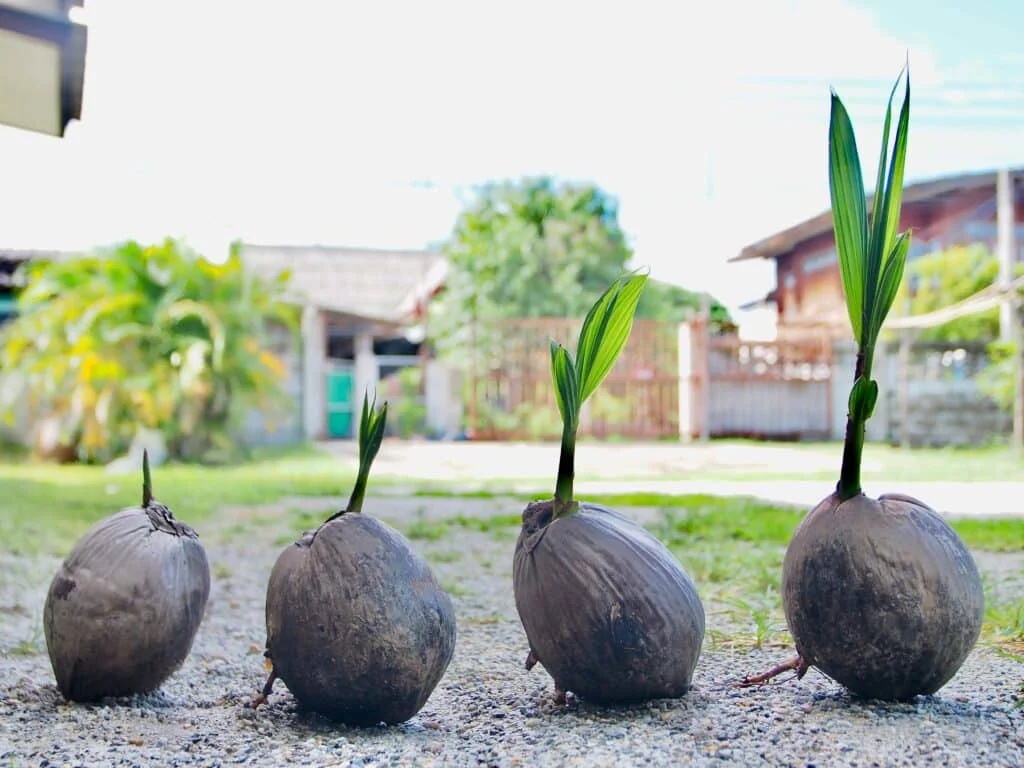
🥥 Step 5: Nurturing the Seedlings
Once the coconut starts sprouting:
- Allow the shoot to grow 6–8 inches before transplanting.
- Keep the seedlings in partial shade initially to avoid sunburn.
- Water gently and regularly to keep soil moist but not waterlogged.
Fertilization Tip:
- Apply organic compost or cow dung once every 30–40 days
- After 2–3 months, sprinkle a balanced organic fertilizer to encourage strong root growth
🥥 Step 6: Transplanting to the Field
After seedlings reach 12–18 inches and have a well-developed root system:
- Choose a sunny, well-draining field location.
- Dig a 2×2 ft pit, and mix native soil with compost.
- Carefully place the seedling, ensuring the shoot is upright.
- Water immediately and add a mulch layer around the base.
Spacing Recommendations:
- Tall varieties: 25–30 ft apart
- Dwarf varieties: 15–20 ft apart
Proper spacing ensures optimal sunlight, airflow, and nutrient availability.
🥥 Step 7: Sunlight and Watering
Coconut trees thrive in full sunlight:
- Provide 6–8 hours of sunlight daily.
- Water 2–3 times per week during dry periods.
- Mulching helps retain soil moisture and prevents weeds.
Avoid overwatering to prevent root rot, which is a common cause of seedling loss.
🥥 Step 8: Fertilization and Care
For faster growth and better fruiting:
- Young Plants: Use vermicompost or cow dung every 30–40 days
- After 1 Year: Apply organic fertilizers rich in nitrogen, phosphorus, and potassium
- During Flowering and Fruit Set: Apply potassium-rich organic fertilizers for better yield
Additional Tips:
- Prune dead or weak fronds to promote air circulation
- Protect seedlings from strong winds using temporary stakes
- Monitor regularly for pests such as mites or caterpillars
🥥 Step 9: Advantages of This New Technique
- Faster Germination: Seedlings sprout in 3–6 months instead of 6–12 months
- Stronger Roots: Controlled conditions produce robust roots for transplanting
- Early Fruit Production: Healthy seedlings bear fruits sooner
- Higher Survival Rate: Optimal moisture and soil conditions reduce seedling mortality
- Uniform Growth: Produces consistent, healthy coconut trees suitable for orchards
🥥 Step 10: Common Problems and How to Solve Them
❌ Seedling Rot
- Cause: Excessive waterlogging
- Solution: Ensure proper drainage and reduce watering
❌ Slow Sprouting
- Cause: Old or dry coconuts
- Solution: Use fresh, mature coconuts and soak before planting
❌ Pests
- Cause: Aphids, caterpillars, or mites
- Solution: Spray neem oil or natural insecticidal solutions regularly
❌ Weak Shoot Growth
- Cause: Insufficient sunlight or nutrients
- Solution: Provide partial sunlight initially, then gradually full sun, and feed organic fertilizers
🥥 Step 11: When Will Your Coconut Trees Start Producing Fruit?
- Traditional planting: 6–10 years
- New technique: 4–6 years
With proper care and the new method, trees become stronger, healthier, and more productive, giving homegrown coconuts faster than traditional methods.
🌟 Conclusion
This great new technique for growing coconut trees is a game-changer for gardeners, hobbyists, and commercial farmers. By using controlled germination, pre-treatment, and proper nurturing, anyone can grow healthy coconut seedlings that establish quickly, survive transplantation, and bear fruits earlier than traditional methods.
Whether you have a backyard garden, balcony, or small orchard, this method is practical, sustainable, and rewarding. Start today, and in a few years, you could enjoy fresh, homegrown coconuts while contributing to a greener environment! 🌴🥥