Bean sprouts are a superfood that anyone can grow at home. Packed with vitamins, minerals, and protein, they are one of the healthiest additions to your meals. Traditionally, sprouts require frequent watering, but what if there was a method that eliminates constant watering and still produces fast-growing, healthy, high-yield sprouts?
Yes! This innovative, beginner-friendly method allows you to grow bean sprouts at home with minimal effort, no soil, and almost no water. In just a few days, you can enjoy fresh, crunchy sprouts straight from your kitchen — perfect for salads, sandwiches, soups, and stir-fries.
This article will guide you step by step through the process and reveal the secret that makes this method so efficient.
🌱 Why Bean Sprouts Are Perfect for Home Gardening
Bean sprouts are easy to grow, nutrient-rich, and extremely versatile. Some reasons they are ideal for home cultivation include:
- Rapid growth: Ready to harvest in 2–5 days
- Minimal space requirement: Can grow on kitchen shelves, balconies, or small tables
- High nutrition: Rich in vitamins A, C, K, protein, fiber, and antioxidants
- Zero soil needed: Reduces mess and prevents soil-borne diseases
- Low maintenance: No complex tools or fertilizers required
With the right method, even someone with no gardening experience can produce sprouts consistently without worrying about watering schedules.
🫘 Step 1: Choose the Right Seeds
The first step to successful bean sprouts is selecting high-quality seeds. Not all beans sprout quickly or reliably.
Best seeds for quick, high-yield sprouts:
- Mung beans (most popular and fastest)
- Lentils
- Chickpeas
- Adzuki beans
Tip: Use organic or untreated seeds to ensure healthy sprouting.
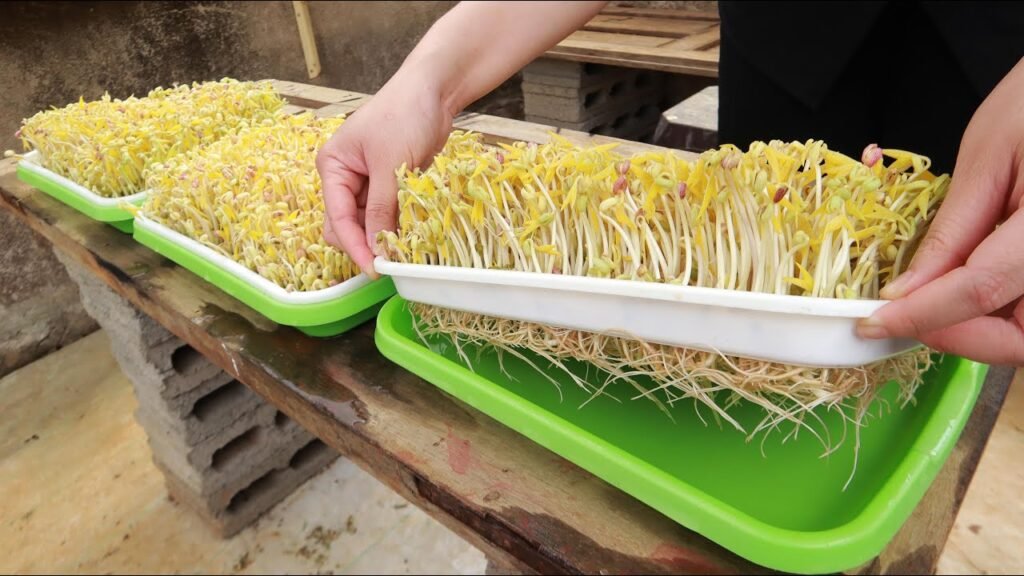
🥣 Step 2: Prepare the Sprouting Container
The container is a key part of this “no-watering” method. You need:
- A jar or tray with a lid
- A mesh or cloth to cover the opening (allows air circulation)
- A base that keeps seeds slightly elevated above moisture
The trick is to use minimal water at the bottom, letting the beans absorb moisture gradually without full immersion. This prevents rot and reduces the need for repeated watering.
💧 Step 3: The Minimal-Water Technique
Here’s the secret that makes this method so effortless:
- Place a small layer of clean water at the bottom of your container (just enough to touch the base of the seeds)
- Spread soaked beans on a breathable cloth, mesh, or perforated tray above the water
- Cover loosely to maintain humidity while allowing airflow
- The beans draw moisture from the water gradually, so there’s no need to water daily
This creates a self-regulating system. Roots grow downward, sprouts grow upward, and the beans stay hydrated naturally.
🌿 Step 4: Soaking Seeds for Faster Sprouts
Before placing seeds in the container:
- Rinse the seeds thoroughly
- Soak them in water for 6–12 hours depending on the type (mung beans take 6 hours; chickpeas take 12)
This step activates germination. After soaking, drain excess water and place seeds on your cloth or tray. No additional watering is needed because the container system keeps them moist.
🌞 Step 5: Provide Ideal Conditions for Growth
Even though this method doesn’t require watering, sprouts still need the right conditions:
- Temperature: 20–25°C (room temperature is ideal)
- Light: Indirect sunlight or indoor lighting
- Airflow: Sufficient to prevent mold and allow healthy growth
Keep the container away from direct heat or drafts, which could dry out the seeds.
🕒 Step 6: Daily Care (Minimal!)
This “no-watering” method is designed for low maintenance:
- Check moisture at the bottom: ensure water is not completely dry
- Rinse and drain only once or twice if necessary (not daily)
- Remove any spoiled or moldy seeds
Because the seeds absorb water gradually, you avoid the tedious task of frequent watering that most sprouting methods require.
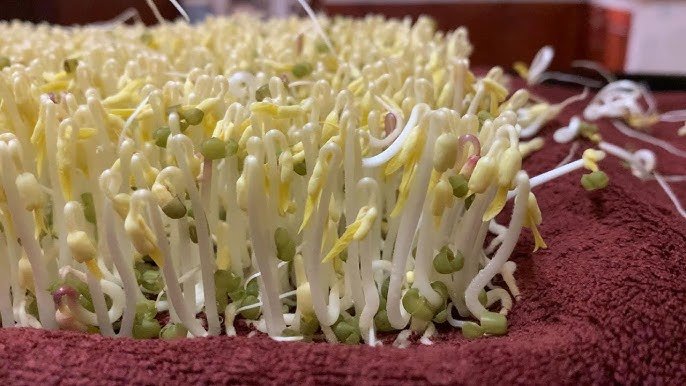
🌱 Step 7: Watch the Magic of Rapid Growth
Bean sprouts grow very quickly. With this system:
- Mung beans: 2–3 days
- Lentils: 3–4 days
- Chickpeas: 4–5 days
Sprouts grow upward, roots reach the water below, and the container setup keeps everything stable. You’ll be amazed at how fast the sprouts fill your container without constant attention.
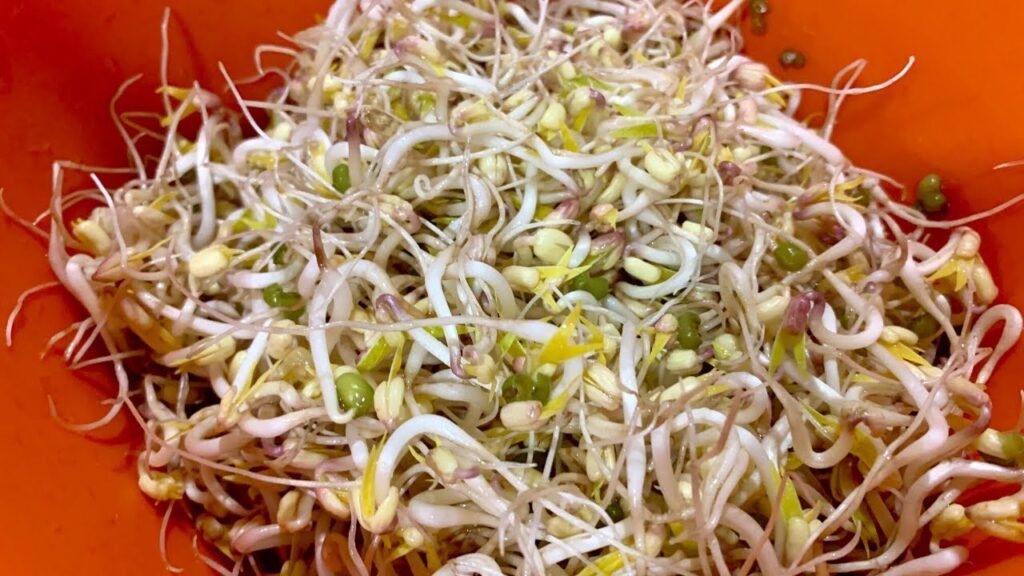
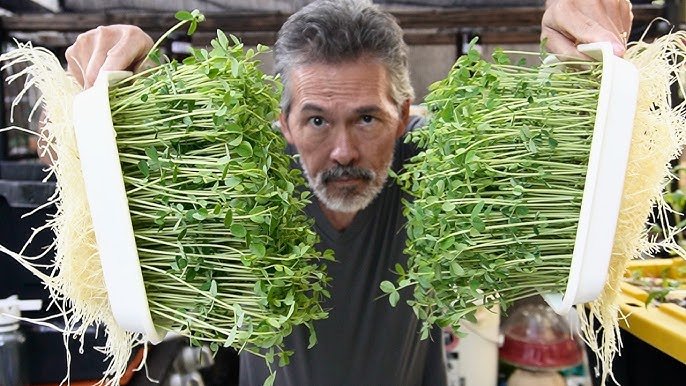
🍴 Step 8: Harvesting Bean Sprouts
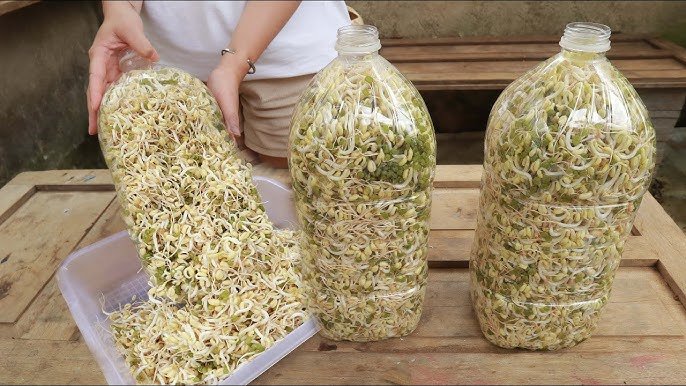
Harvesting is easy and rewarding. Look for these signs:
- Sprouts reach 2–5 inches in length (depending on bean type)
- Stems are crisp, white, and tender
- Roots are healthy but not overly long
Cut or gently pull sprouts from the tray. Wash thoroughly before eating. Use them fresh in salads, sandwiches, stir-fries, soups, or as garnish.
🌟 Step 9: Tips for Maximum Yield
Follow these tips to ensure consistently abundant sprouts:
- Use fresh seeds — older seeds may sprout slowly.
- Maintain a little water at the bottom — too much water causes rot, too little slows growth.
- Avoid overcrowding — give seeds space to grow for bigger, stronger sprouts.
- Rotate containers gently — ensures even growth and sunlight exposure.
- Rinse occasionally — even though daily watering isn’t needed, a light rinse every 2–3 days prevents bacteria buildup.
By following these steps, you can enjoy a high-yield harvest every week.
🌿 Health Benefits of Homegrown Bean Sprouts
Bean sprouts are more than just delicious. They’re a nutritional powerhouse:
- Rich in vitamins A, C, K, and folate
- High in protein and fiber
- Contain enzymes that aid digestion
- Boost immunity and energy
- Chemical-free and freshly harvested
By growing your own sprouts at home, you ensure fresh, safe, and nutritious food, free from preservatives or pesticides.
🏡 Step 10: Why This Method Is Perfect for Urban Homes
For apartment dwellers or people with no garden space, this method is a game-changer:
- Requires almost no space — jars, trays, or small containers work perfectly
- Produces continuous harvests every few days
- Clean, soil-free, and easy to manage indoors
- Suitable for beginners and children learning gardening basics
Even with a tiny balcony or kitchen shelf, you can enjoy fresh, crunchy, homegrown sprouts year-round.
🍀 Conclusion: Effortless, High-Yield Sprouts at Home
Growing bean sprouts at home doesn’t have to be complicated or labor-intensive. This minimal-water, soil-free method allows even beginners to produce fast, high-yield sprouts with virtually no effort.
From soaking seeds to harvesting crisp, nutritious sprouts in just a few days, this method is efficient, clean, and beginner-friendly. Whether you’re looking for healthy snacks, salad toppings, or ingredients for stir-fries, this simple technique ensures fresh, chemical-free, high-yield sprouts every week.
Start today, set up your container, and in just a few days, enjoy crispy, crunchy, nutrient-packed bean sprouts right from your kitchen — all without constant watering or a garden!