Carrots are a kitchen favorite: sweet, crunchy, and packed with nutrients. But growing them at home can sometimes be tricky. Improper soil, poor fertilization, or overcrowding can result in thin, short, or misshapen roots. The good news? There’s a simple method to grow carrots like a pro, ensuring a rich, healthy harvest while also using natural fertilizer to maximize flavor and size.
This article will guide you step by step on planting, nurturing, and harvesting carrots, while introducing a natural fertilizer method that few gardeners know about. By the end, you’ll see why this technique is a game-changer for home vegetable gardening.
Why Grow Carrots at Home?

Carrots are more than just a tasty addition to meals—they offer multiple benefits:
1. Nutritional Powerhouse
- Rich in beta-carotene (Vitamin A) for eye health
- Packed with fiber, aiding digestion
- Contain antioxidants, which boost immunity
2. Superior Taste
Homegrown carrots are naturally sweeter and fresher than store-bought ones.
3. Cost-Effective
A small patch or container can provide a continuous supply, saving money on grocery bills.
4. Fun and Educational
Watching carrots grow from seed to harvest is an educational and rewarding experience, perfect for families and beginners.
Step 1: Choose the Right Variety
Carrots come in many shapes, colors, and sizes. Select a variety suited to your growing space and climate:
- Danvers – Classic, long, and sweet; grows well in deep soil
- Nantes – Cylindrical, smooth, and ideal for containers
- Chantenay – Short and thick; perfect for shallow soil
Tip:
Choose organic seeds for healthier, chemical-free carrots.
Step 2: Prepare the Soil
Carrots need loose, well-drained soil to develop straight, smooth roots.
Soil Preparation Tips
- Loosen soil to a depth of at least 12 inches.
- Remove stones, debris, and clumps to prevent forked roots.
- Mix natural compost or well-rotted manure to improve fertility and structure.
Step 3: The Secret Natural Fertilizer for Carrots
Carrots thrive when fed mild, nutrient-rich fertilizer. Here’s a natural method that works wonders:
- Banana Peel Fertilizer
- Chop up old banana peels.
- Bury them lightly in the soil where carrot seeds will be planted.
- Banana peels release potassium, phosphorus, and calcium—essential nutrients for root growth and sweetness.
- Compost Tea
- Soak a handful of compost in water overnight.
- Use the liquid to water the carrot bed.
- This encourages vigorous growth and rich soil microbes.
Tip: Avoid chemical fertilizers with high nitrogen—they promote leaf growth but weaken the roots.
Step 4: Sowing the Seeds
Carrot seeds are tiny, so handle them carefully:
- Make shallow furrows in the soil, about 0.5–1 cm deep.
- Scatter seeds evenly, leaving space between them for future thinning.
- Cover lightly with soil and gently water using a fine mist.
Pro Tip
- To prevent overcrowding, mix seeds with sand before sowing. This helps spread them evenly.
Step 5: Watering and Moisture Management
Carrots require consistent moisture to develop straight, tender roots:
- Water lightly but frequently, keeping the soil evenly moist.
- Avoid overwatering, which can cause rot or fungal problems.
- Mulch with straw or dry leaves to retain moisture and regulate temperature.
Step 6: Thinning Seedlings
Once seedlings sprout and reach 2–3 inches, thin them to 3–5 cm apart.
- Carefully remove weaker seedlings to reduce competition.
- Proper spacing ensures each carrot has enough room to grow thick and straight.
Step 7: Sunlight and Placement
Carrots need full sunlight for 6–8 hours daily.
- In hot climates, partial afternoon shade prevents bolting (premature flowering).
- In containers, place them where they receive direct morning sunlight.
Step 8: Weed and Pest Management
Carrots are prone to pests like carrot flies and weeds can stunt growth:
- Companion planting: Plant onions or leeks nearby to repel pests naturally.
- Light mulch: Helps prevent weeds and maintain soil moisture.
- Inspect regularly: Remove damaged leaves or pests manually if possible.
Step 9: Fertilizing During Growth
After seedlings have established, provide a gentle feed:
- Sprinkle compost or organic fertilizer every 3–4 weeks.
- Avoid over-fertilizing with nitrogen, which weakens roots.
- Banana peel pieces or diluted compost tea can be added near roots for continued nutrient supply.
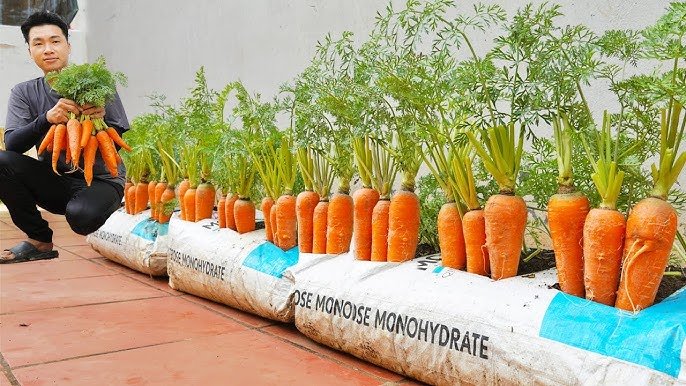
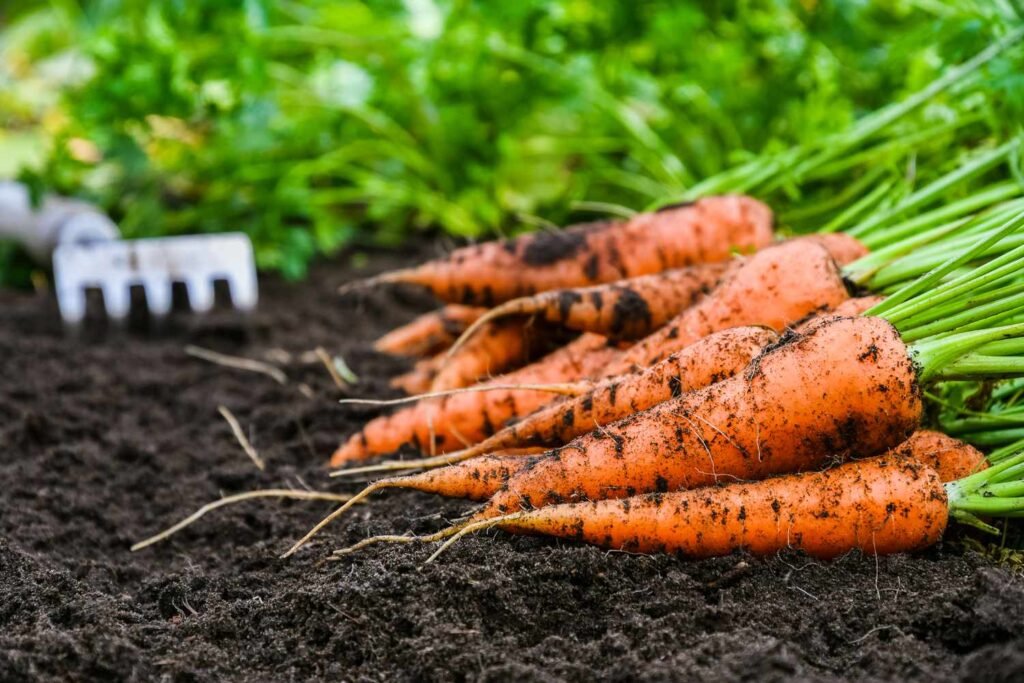
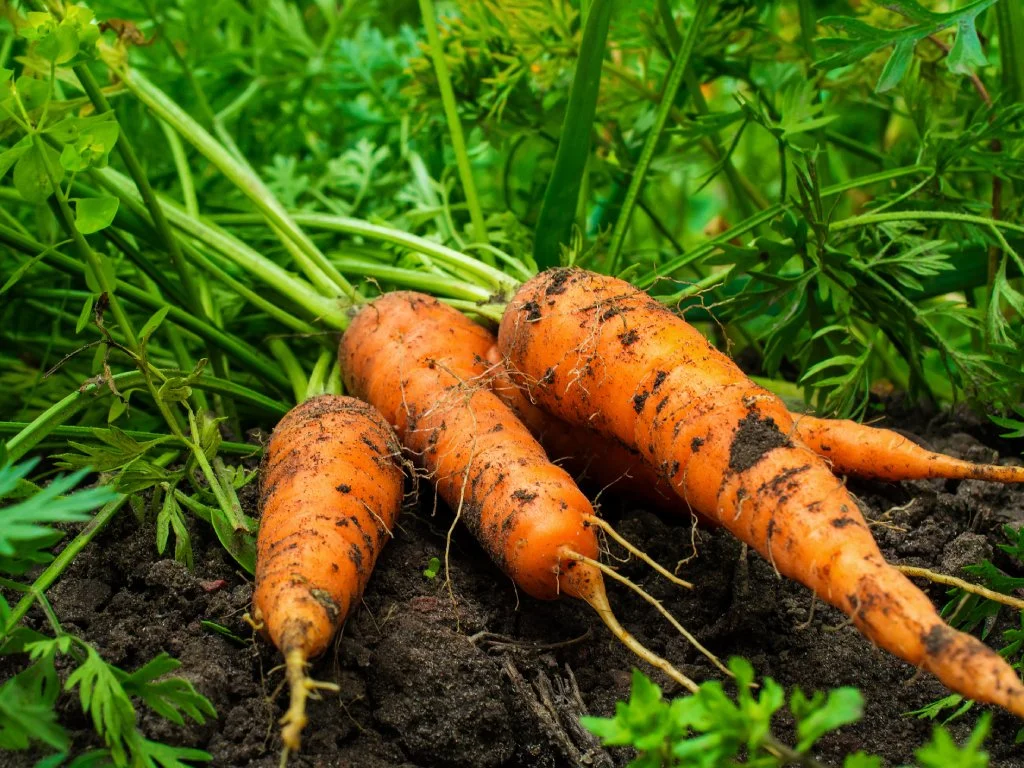
Step 10: Harvesting Carrots

Carrots are typically ready in 70–90 days, depending on variety. Signs of readiness include:
- Foliage is healthy and vibrant.
- Roots have reached the desired size (check by gently brushing soil away).
- The tip of the root may peek above soil surface.
Harvesting Tips:
- Loosen soil around the root before pulling.
- Avoid twisting or yanking, as this can break the carrot.
- Wash thoroughly and enjoy fresh, homegrown carrots.
Bonus Tip: Continuous Carrot Harvest
- Plant carrots in staggered intervals every 2–3 weeks.
- This ensures a steady supply of fresh carrots throughout the season.
- Rotate soil and replenish compost or banana peel fertilizer to maintain soil health.
Why This Method Works So Well
- Natural Fertilizer: Using banana peels and compost tea provides essential nutrients without chemicals.
- Proper Spacing: Thinning seedlings ensures thick, healthy roots.
- Consistent Watering: Prevents splitting, bolting, or stunted growth.
- Sunlight & Airflow: Proper placement reduces pests and encourages photosynthesis.
This approach is beginner-friendly, eco-friendly, and highly rewarding.
Creative Ideas for Carrot Gardening at Home
- Container Gardening: Plant in deep pots or recycled buckets for urban spaces.
- Vertical Beds: Stack trays for more yield in small balconies.
- Mixed Vegetable Patch: Pair carrots with herbs or leafy greens for companion benefits.
- Decorative Mulch: Use straw or dried leaves for both aesthetics and moisture retention.
Final Thoughts
Growing carrots at home doesn’t have to be difficult. With proper soil preparation, natural fertilizer, and careful attention to spacing and watering, you can enjoy a rich harvest of sweet, crunchy carrots.
Using simple household items like banana peels and compost not only improves root growth but also promotes healthy, eco-friendly gardening. By following these steps, you’ll turn even a small backyard or container into a productive carrot garden, and you’ll never look at gardening the same way again.
Start today, plant carrots the right way, and enjoy healthy, homegrown vegetables that taste better than anything store-bought!