Rosemary (Rosmarinus officinalis) is one of the most aromatic and versatile herbs in the garden. Known for its fragrant leaves, culinary uses, and medicinal properties, rosemary is a favorite among gardeners and chefs alike. While it can be grown from seeds or soil cuttings, one of the quickest and easiest ways to propagate rosemary is in water. This method allows even beginners to create healthy, new plants without specialized equipment or complicated techniques.
In this guide, we’ll explore step-by-step instructions for propagating rosemary in water, tips for success, and expert care techniques to help your new plants thrive.
🌿 Why Propagate Rosemary in Water?

Water propagation offers several advantages for gardeners:
- Quick Results: Rooting in water is faster than some soil-based methods.
- Easy Monitoring: You can see roots as they develop and know exactly when the plant is ready for planting.
- Minimal Equipment Needed: Just a glass, jar, or vase and some clean water.
- High Success Rate: Healthy cuttings develop roots reliably when proper techniques are used.
This method is perfect for gardeners who want to multiply their rosemary plants rapidly or start a new herb garden from a small parent plant.
🌱 Step 1: Selecting the Right Rosemary Cutting
The first step is choosing healthy cuttings from a mature rosemary plant:
- Pick new growth stems that are green, firm, and 10–15 cm long.
- Avoid old, woody stems, as they root slowly or fail.
- Ensure the stem is free from disease, pests, or discoloration.
💡 Pro Tip: Cuttings taken in the morning, when the plant is hydrated, have a higher success rate.
🌿 Step 2: Preparing the Cuttings
Proper preparation improves rooting success:
- Trim the Cutting: Remove the lower 2–3 cm of leaves. This is the part that will be submerged in water.
- Optional Rooting Hormone: Dip the cut end into rooting hormone to stimulate faster root growth.
- Cut at an Angle: Make a clean, angled cut just below a leaf node to increase the surface area for rooting.
💡 Secret: Even without rooting hormone, healthy rosemary cuttings can develop strong roots in water if kept in ideal conditions.
🌱 Step 3: Choosing the Right Container
Water propagation requires a suitable container:
- Use a clear glass, jar, or vase to monitor root development.
- Ensure the container is clean to prevent bacterial growth.
- Fill with fresh, room-temperature water. Avoid distilled or chlorinated water if possible, as natural tap water works best.
💡 Tip: Using a transparent container allows you to see roots and gauge water quality, which is essential for preventing rot.
🌿 Step 4: Placing the Cutting in Water
Once your cutting and container are ready:
- Submerge the trimmed stem section in water. Ensure no leaves are underwater, as they can rot and affect rooting.
- Place the container in bright, indirect sunlight. Avoid direct sun, which can overheat and damage the cutting.
- Keep the water level consistent, topping up as needed.
💡 Secret: Rosemary cuttings are sensitive to stagnant water. Changing the water every 5–7 days prevents bacterial growth and encourages healthy root development.
🌱 Step 5: Rooting Time and Observation

Rosemary cuttings typically develop roots in 2–4 weeks, depending on temperature and stem maturity:
- Look for small, white root tips emerging from the cut end.
- Growth may be slower in cooler temperatures (below 18°C/65°F).
- Healthy cuttings should remain firm and green throughout the rooting period.
💡 Tip: Avoid disturbing cuttings during early rooting stages; gentle handling ensures roots are not damaged.
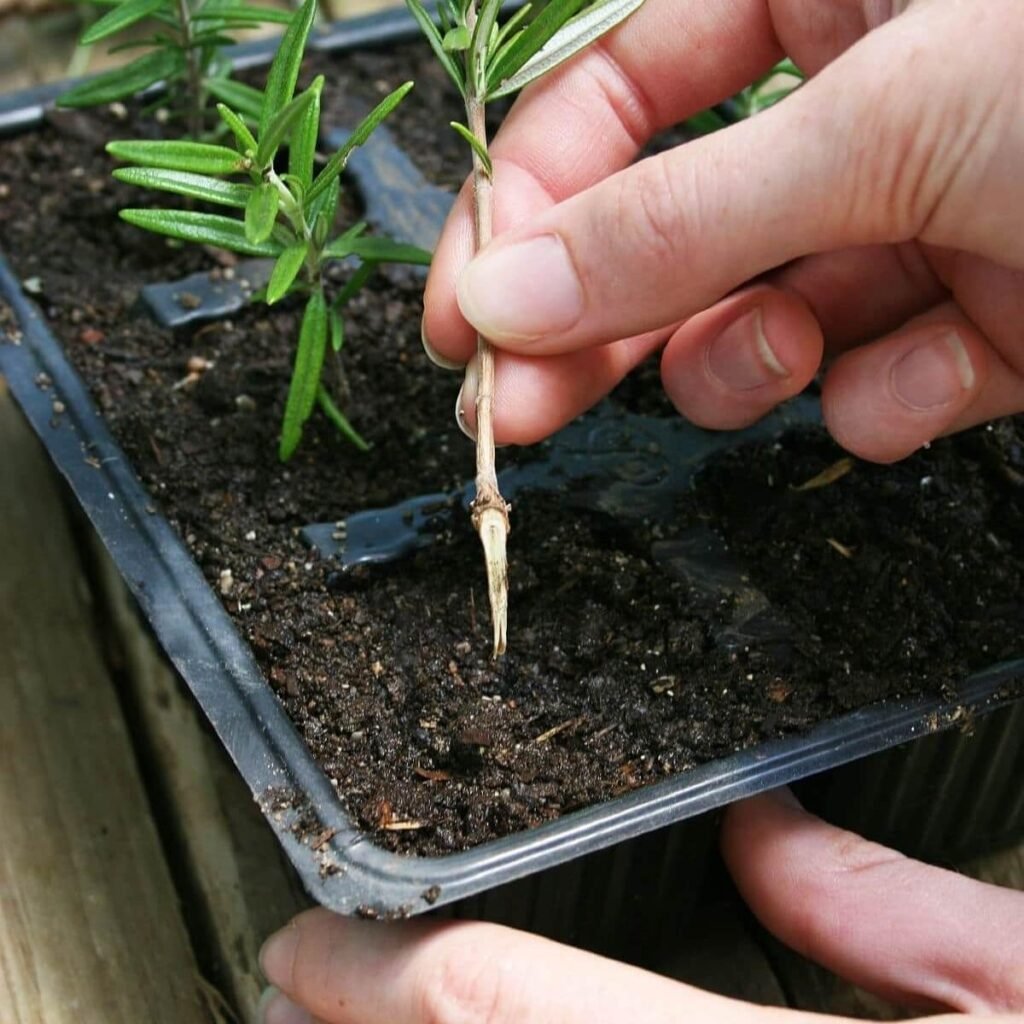
🌿 Step 6: Preparing for Transplanting
Once roots are 3–5 cm long, the cutting is ready for soil:

- Prepare a well-draining potting mix: sandy soil mixed with compost or perlite works best.
- Choose a pot or garden space with good drainage to prevent root rot.
- Fill the container lightly, creating a hole for the rooted cutting.
💡 Secret: Roots formed in water are tender; transplant carefully to minimize shock.
🌱 Step 7: Transplanting the Rooted Cutting
Transplanting ensures your new rosemary plant establishes well:
- Gently remove the cutting from water, supporting the roots.
- Place it into the prepared soil, covering the roots fully.
- Press the soil gently around the base to secure the plant.
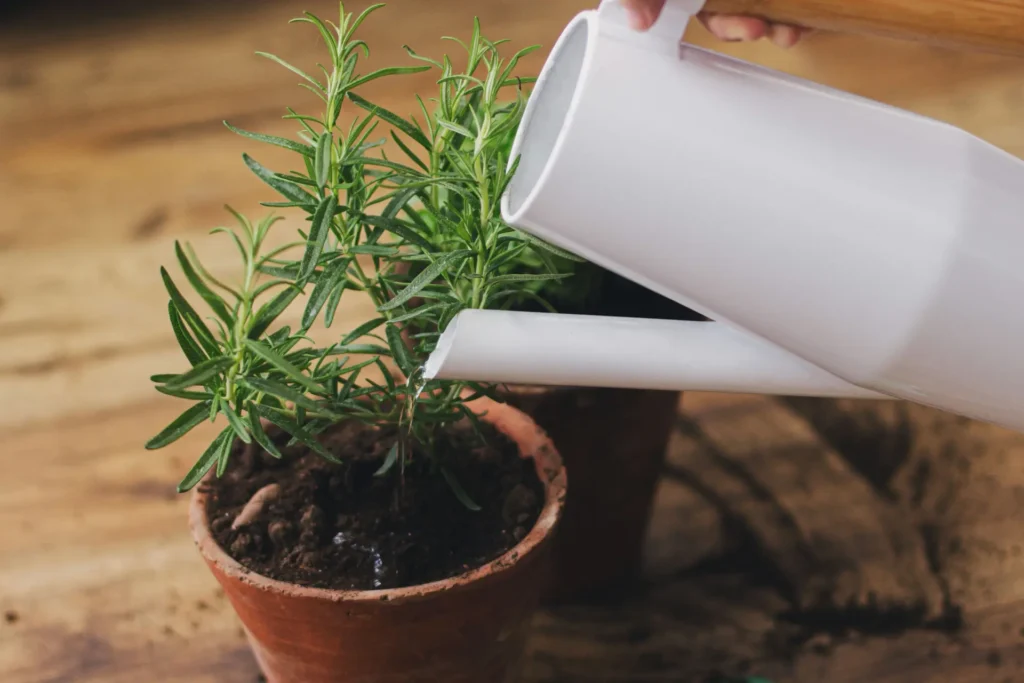
- Water lightly to settle the soil, avoiding overwatering.
💡 Tip: Initially, keep the plant in partial shade for 3–5 days to help it adjust to soil conditions.
🌿 Step 8: Ongoing Care for New Rosemary Plants
Caring for your newly rooted rosemary ensures healthy growth and high yield:
- Watering: Water moderately until the plant is established; rosemary prefers slightly dry soil once mature.
- Sunlight: Provide 6–8 hours of direct sunlight daily for strong, fragrant leaves.
- Fertilization: Light feeding with compost or organic fertilizer encourages bushy growth.
- Pruning: Trim lightly to promote branching and denser foliage.
💡 Secret: Avoid overwatering and excessive nitrogen; these can reduce essential oil concentration and flavor.
🌱 Step 9: Common Problems and Solutions
- Root Rot: Caused by stagnant water or poor drainage. Solution: Change water regularly and use well-draining soil for transplanting.
- Yellowing Leaves: Can indicate overwatering or insufficient light. Adjust conditions accordingly.
- Slow Rooting: Ensure proper cutting selection, bright indirect light, and moderate temperature.
- Pests: Aphids or spider mites may appear once transplanted. Treat with neem oil or gentle washing.
💡 Secret: Vigilance during early growth stages ensures strong, resilient plants.
🌿 Step 10: Advantages of Water Propagation
Water propagation is a simple and efficient method to multiply rosemary plants quickly:
- Low-cost method: No special equipment needed.
- Easy monitoring: See roots grow and adjust conditions if needed.
- High success rate: Healthy cuttings establish reliably.
- Perfect for indoor propagation: No outdoor soil required initially.
💡 Tip: Water propagation is ideal for winter months or when outdoor conditions are unfavorable.
🌱 Step 11: Styling and Practical Uses
Once established, rosemary can be used in multiple ways:
- Garden Beds: Add aroma and visual appeal to herb gardens.
- Potted Plants: Perfect for balconies, kitchens, and patios.
- Culinary Uses: Harvest fresh leaves for cooking, teas, and seasoning.
- Decorations and Gifts: Dried rosemary can be used in bouquets or homemade crafts.
💡 Secret: Regular harvesting encourages bushier growth and stronger aroma.
🌿 Step 12: Final Tips for Success
- Always choose healthy parent plants for propagation.
- Maintain consistent water and light conditions during rooting.
- Transplant carefully to prevent shock and support establishment.
- Prune and harvest regularly to maintain strong, productive plants.
💡 Secret: By mastering water propagation, you can create an endless supply of rosemary plants for your garden, kitchen, or gifting purposes.
🌱 Final Thoughts
Propagating rosemary in water is quick, easy, and highly rewarding. This method allows gardeners of all skill levels to multiply plants efficiently and enjoy fresh, aromatic rosemary at home. By selecting healthy cuttings, maintaining clean water, and transplanting carefully, you can produce vibrant, thriving plants ready for culinary, decorative, or medicinal use.
With patience, attention, and consistent care, water-propagated rosemary can become the cornerstone of a productive herb garden, ensuring a continuous supply of fragrant leaves for years to come.