In today’s world, recycling and sustainable gardening go hand in hand. Imagine transforming discarded plastic bottles into vibrant green gardens that flourish outdoors—saving money, reducing waste, and creating a beautiful eco-friendly space at the same time. Outdoor plant growth in rejected plastic bottles is not just a fun project; it’s a practical, sustainable, and innovative way to grow your own vegetables, herbs, and flowers—even in small spaces like balconies, terraces, and yards.
This guide will take you step by step through preparing bottles, choosing plants, planting techniques, maintenance, and harvesting so you can start your outdoor bottle garden with confidence.
🌱 Why Use Rejected Plastic Bottles for Outdoor Gardening?
Plastic bottles are everywhere, and most of them end up polluting landfills or rivers. Repurposing them for gardening offers several advantages:
Benefits:
- Cost-effective: Free or nearly free containers.
- Eco-friendly: Reduces plastic waste and carbon footprint.
- Space-saving: Perfect for small yards, terraces, or balconies.
- Portable: Easy to move around for sunlight or shade.
- Controlled growth: You can monitor soil, water, and plant growth closely.
By reusing bottles, you not only grow fresh produce but also actively contribute to environmental conservation.
🪴 Choosing the Right Plastic Bottles
Not all plastic bottles are ideal for outdoor planting. Here’s what to consider:
Bottle Size
- Small plants & herbs: 500 ml or 1-liter bottles
- Vegetables & flowers: 2-liter bottles or larger
Bottle Type
- Avoid bottles with toxic residues (like chemical or industrial fluids)
- Clear bottles are fine but might need shading to prevent root overheating
- Sturdy bottles hold soil and water better
Shape & Design
- Bottles with a cylindrical body are easiest for soil filling
- Bottles with a flat base or you can cut the sides to create pockets for multiple plants
✂️ Preparing Plastic Bottles for Planting
Before planting, you need to prepare the bottles for soil and water management.
Step-by-Step Preparation
- Clean the bottle thoroughly to remove any chemicals or residues.
- Make drainage holes at the bottom using a nail, screwdriver, or hot needle. Proper drainage prevents waterlogging.
- Optional: Cut the side of the bottle to create a planting pocket—great for vertical gardening.
- Add a layer of small stones or pebbles at the bottom to improve drainage.
🌾 Choosing the Best Plants for Bottle Gardening Outdoors
Not every plant thrives in bottles. Here are the best options:
Vegetables
- Lettuce
- Spinach
- Radish
- Tomatoes (dwarf varieties)
- Chili peppers
- Green onions
Herbs
- Mint
- Basil
- Coriander (Cilantro)
- Thyme
- Rosemary
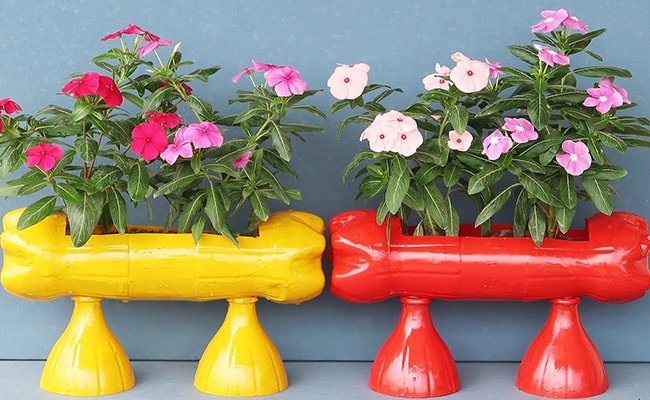
Flowers
- Marigold
- Petunia
- Calendula
- Sunflowers (dwarf types)
💡 Tip: Start with fast-growing plants like lettuce or radish. They’re forgiving and offer quick results.
🌞 Sunlight and Placement

Outdoor bottle gardens require proper sunlight:
- Most vegetables: 5–6 hours of direct sunlight daily
- Herbs: 4–5 hours, depending on variety
- Flowers: 6–8 hours for vibrant blooms
Tips for Bottle Placement
- Place bottles on a raised platform to avoid pests
- Rotate bottles weekly for even sunlight exposure
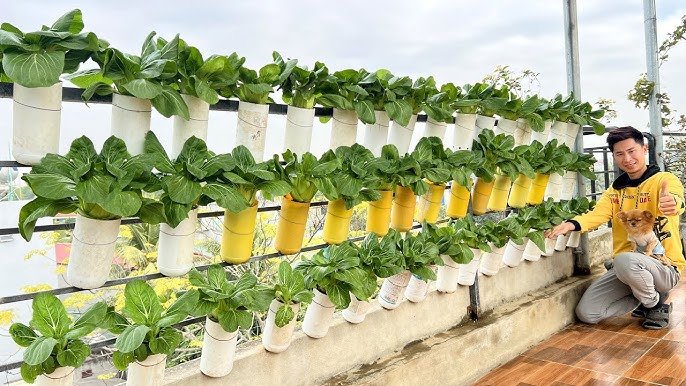
- Hang bottles using strings or wall-mounted racks for vertical gardening
💧 Watering Tips for Plastic Bottle Plants
Bottle gardens have limited soil, so water management is crucial:
- Check soil daily: Soil should be moist but not soggy
- Water slowly: Use a small watering can or drip method to avoid washing soil out
- Mulch lightly: Small pieces of dry leaves or straw on top help retain moisture
- Self-watering idea: Use two bottles—one inverted inside the other to create a mini drip system
💡 Tip: Overwatering leads to root rot, under-watering slows growth. Balance is key.
🌿 Soil and Fertilizer for Bottle Gardening

Plastic bottles hold limited soil, so nutrient management is important:
Ideal Soil Mix
- 40% garden soil
- 30% compost or vermicompost
- 20% cocopeat or peat moss for moisture retention
- 10% sand for drainage
Fertilizer
- Liquid organic fertilizers every 10–15 days (e.g., diluted cow dung slurry, compost tea, or neem cake solution)
- Avoid chemical fertilizers as limited soil can easily get burned
🐛 Pest and Disease Management
Bottle gardens are small, but pests can still appear:
Common Issues
- Aphids and mites on herbs
- Whiteflies on leafy vegetables
- Fungal growth due to overwatering
Organic Solutions
- Spray neem oil or diluted soap water on affected plants
- Keep air circulation good by spacing bottles
- Remove damaged or diseased leaves immediately
🌾 Planting Techniques in Bottles
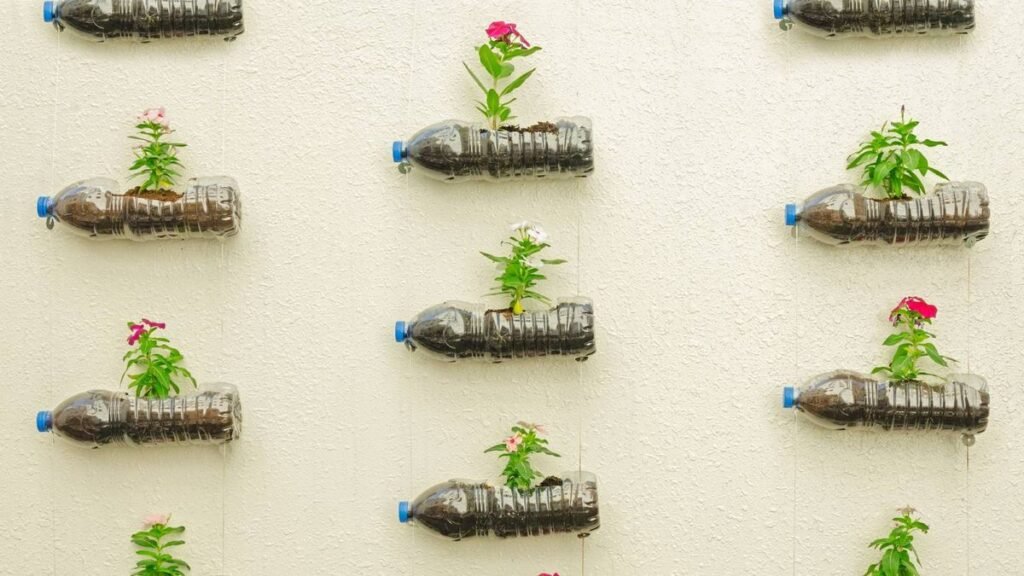
Method 1: Vertical Hanging Bottle Garden
- Cut a side opening in the bottle
- Fill with soil and plant seeds or saplings
- Hang bottles on a wall, fence, or balcony using rope
Method 2: Horizontal Bottle Garden
- Lay bottles sideways and cut multiple side pockets
- Fill soil and plant small herbs or vegetables in each pocket
- Place in sunny outdoor spots
Method 3: Self-Watering Bottles
- Place a smaller bottle inverted inside a larger one with soil
- Use water reservoir to drip water gradually
- Ideal for herbs and leafy vegetables
🌱 Maintenance Tips for Thriving Outdoor Bottle Plants
- Regular watering (morning or evening is best)
- Prune leaves to promote healthy growth
- Monitor soil nutrients—use compost or liquid fertilizer
- Rotate plants for sunlight exposure
- Support climbing plants like tomatoes or beans with sticks or strings
🥗 Harvesting and Enjoying Your Bottle Garden
Vegetables & Herbs
- Leafy vegetables: harvest after 25–30 days
- Herbs: trim regularly for fresh growth
- Tomatoes & chilies: pick when fully colored
Flowers
- Harvest marigolds or petunias for bouquets or decoration
- Deadhead flowers to promote new blooms
💡 Tip: Harvest lightly and regularly—plants continue producing more leaves and fruits.
🌟 Why Outdoor Bottle Gardening is a Game-Changer
- Eco-friendly: Reduces plastic waste
- Cost-saving: Free containers and homegrown produce
- Space-efficient: Perfect for urban gardening
- Educational: Great for kids to learn about plants and recycling
- Therapeutic: Gardening reduces stress and promotes wellness
🔁 Expand Your Bottle Garden
Once you master the basics, you can:
- Grow multiple types of vegetables and herbs in a vertical setup
- Try companion planting (e.g., marigolds with tomatoes to repel pests)
- Build mini hydroponic systems using bottles
- Share plants with friends and neighbors—promoting sustainable living
🌿 Final Thoughts
Growing outdoor plants in rejected plastic bottles is a perfect example of how small, creative efforts can make a big difference. You reduce waste, save money, and enjoy fresh produce or beautiful flowers—all while using something that would otherwise harm the environment.
Whether you have a balcony, terrace, or small backyard, this method allows anyone, anywhere, to garden creatively and sustainably. Start with a few bottles today, and soon you’ll have a lush, green outdoor garden that’s not only functional but also a beautiful testament to innovation and eco-conscious living.
Turn your plastic trash into a thriving garden—because every bottle can grow a plant, and every plant makes a difference.